Configuring a Build Pipeline on Azure DevOps for an ASP.NET Core API
Configuring a Build Pipeline on Azure DevOps for an ASP.NET Core APIJoao Grassi — a .NET developer, front-end hobbyist, and friend of Sentry — likes .NET very much and recently tried to bring a friend to the "dark side" of .NET development. To win a point, he decided to create a small sample project using Azure DevOps.
As he started, he struggled to find helpful information in the documentation (like how to control the artifact name). As he finished the project, he wondered: Wouldn’t be nice to have this somewhere to save the hassle of Googling everything again?
There's no doubt that Cloud development is becoming more and more popular, and for many, the de facto way of building, deploying, and hosting apps on the web. But many of us still work on our daily jobs in a cloud-less environment due to reasons that are not relevant to this post.
There’s really no excuse when it comes to avoiding cloud development and taking advantage of all the good things you can get from it. One specific benefit is the ability to configure a build pipeline that builds the project, ensures everything is compiling, and checks to see that tests are passing. Build pipelines also produce Artifacts, or .zip files containing the code for your application, that allow you to publish your app on Azure or other cloud services.
What we are going to do
In this post, I want to show you how to:
Create an App Service on Linux on Azure.
Set up a build pipeline on Azure DevOps (previously known as VSTS).
Integrate Azure DevOps with Sentry.
Some requirements
To avoid making this post too long, I'll assume that you already have the following set up:
An account on Azure DevOps within an organization: Just follow the steps here.
The actual code — An ASP.NET Core API up and running (the simplest initial template (ValuesController), either via VS or command line).
At the end, you should have your git repo configured both locally and on Azure DevOps so you're able to push/pull stuff. The "Repos" menu on Azure DevOps Looks like this:
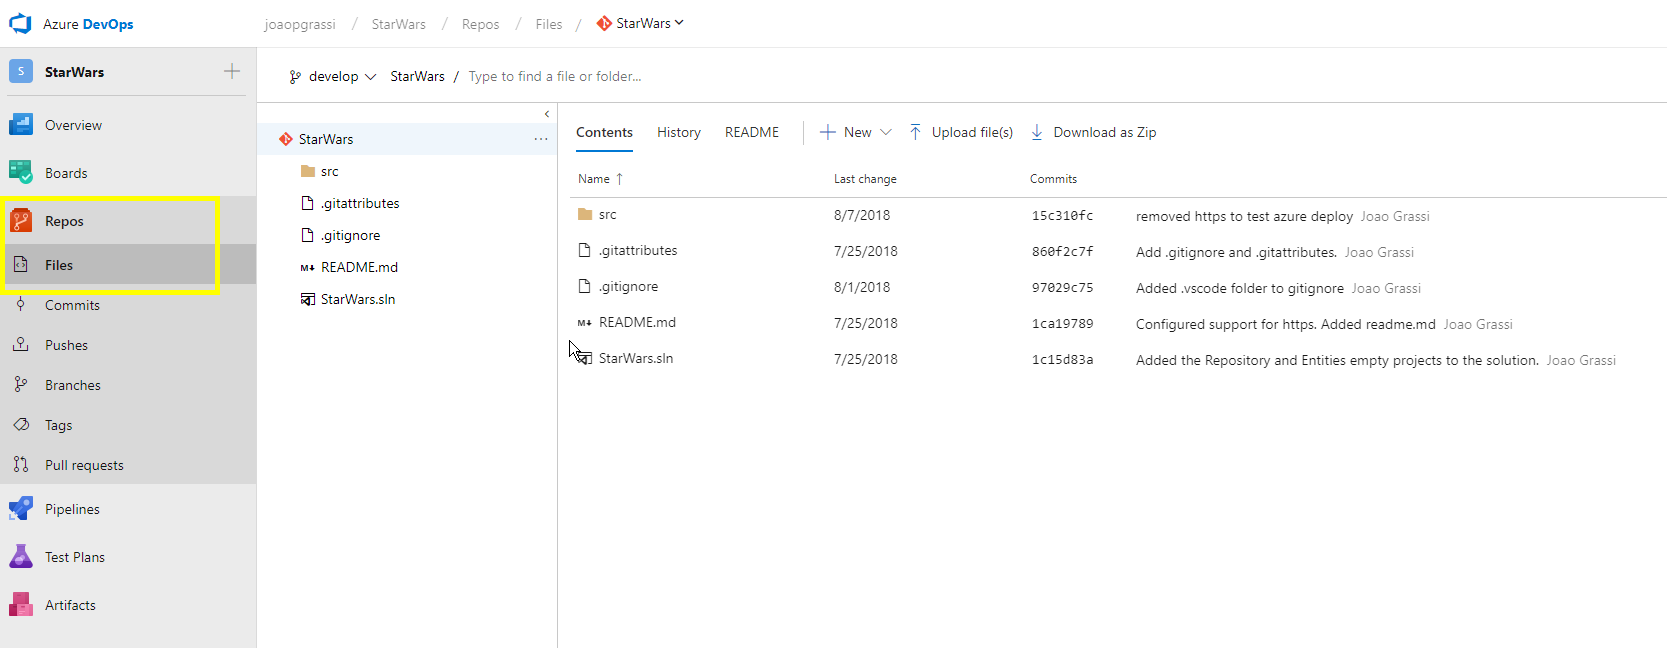
Your Git repo on Azure DevOps
Creating the App Service on Azure
I'm also not going into too much details on how to create the App Service on Azure mainly because it was already explained better before, but I do want to show you via the Azure Portal briefly. So let's go:
Log into your Azure portal (after creating your free account).
Go to: App Services → Add (+) → Web App → Create
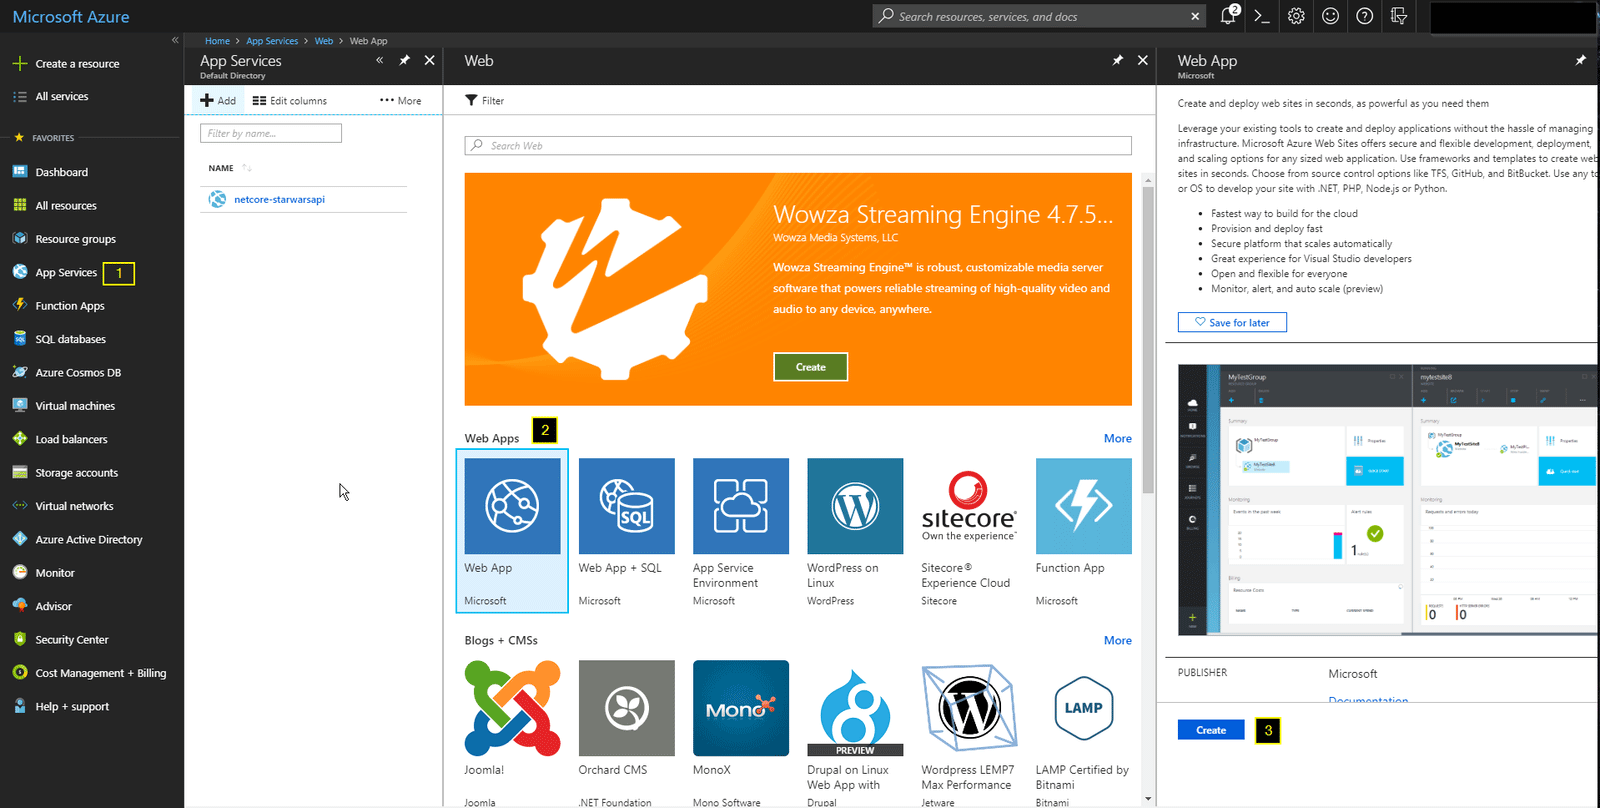
Adding a new Web Application via App Services
Fill in all the fields, as seen here:
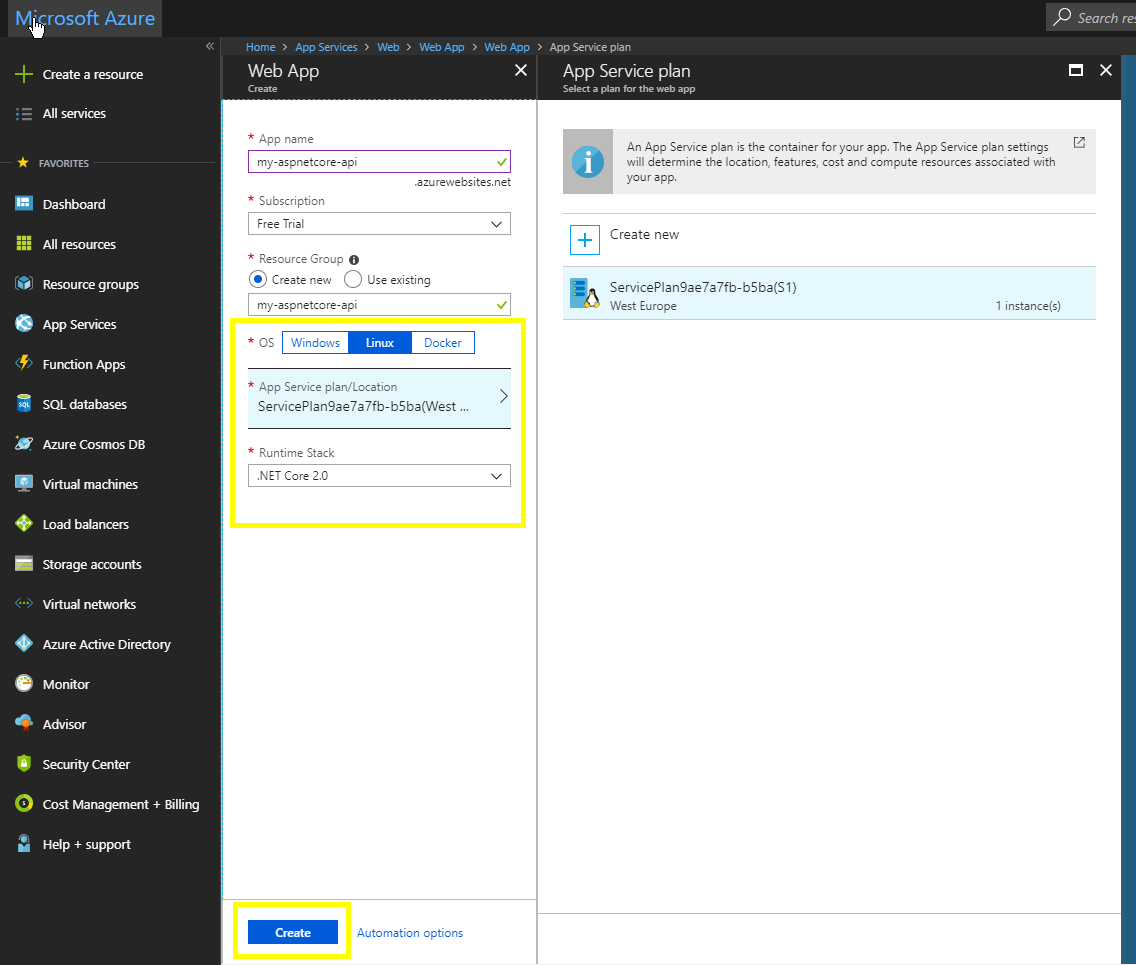
Creating the App Service on Linux
Hit Create!
Creating the build on Azure DevOps
Now that you have your git repo and your App Service created, it's time to configure the build pipeline on Azure DevOps. It's very easy and well integrated with ASP.NET Core, so we'll use most of the pre-defined values:
Navigate to: Pipelines → + New → New build pipeline.
On the next page you need to select the source for the build, which in our case is Azure Repos Git. But as you can see you can connect to other Git providers like GitHub. Select your project and repository (it's probably already pre-selected) and hit Continue.
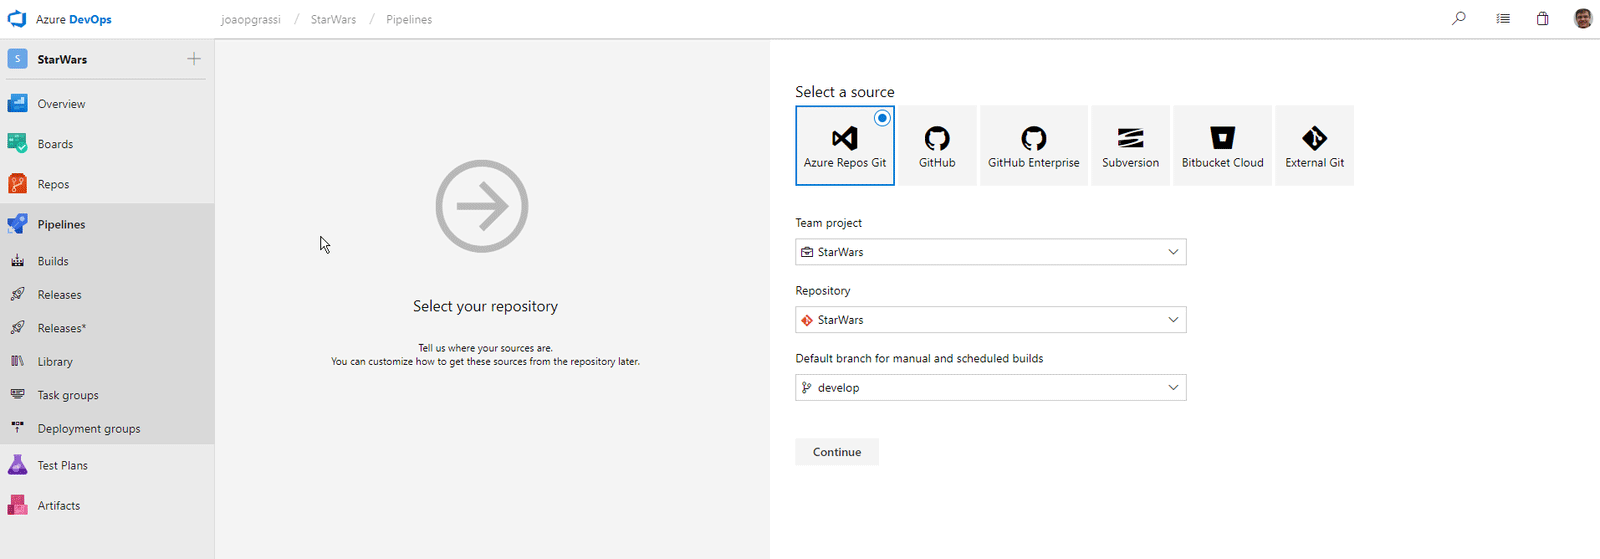
Creating your first build on Azure DevOps
On the "Select a template" page, select ASP.NET Core and hit Apply (you can also search for it).
The next page is where we'll configure the build steps. Since we selected the ASP.NET Core template, Azure DevOps already gives us a set of pre-defined steps. I experimented with those a bit and came up with my own changes. I'll explain each step now:
Pipeline - Build pipeline
The first "box" is the one at the top of everything: Pipeline. There, you can set up the name of the build pipeline, on which agent it runs and the projects to build/restore. Fill in the Build name and Agent "Hosted VS2017". Leave the rest as it is, we will change them later:
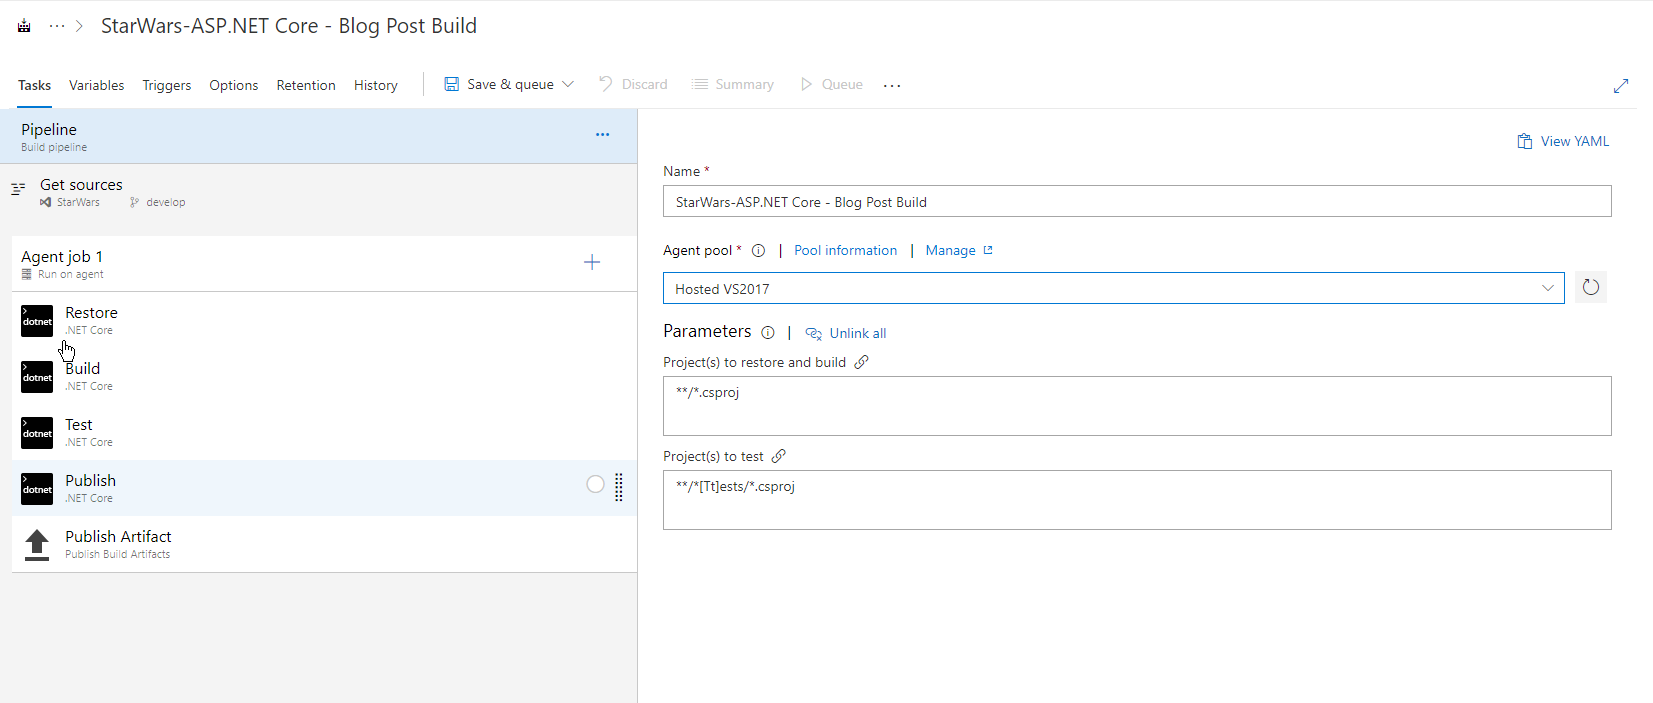
Configuring initial build pipeline
Restore
We don't have to do a restore since .NET Core 2.0, but, in CI builds like this, it's nice to have it separated because we can measure how much time each step took.
Make sure to select the .NET Core version to 2.* The only thing we are going to change here is the Path to project(s). By default it tries to restore all the projects. In our simple API, we just need to restore the Api project.
In the Path to project(s) field, click on the link icon next to it and then on Unlink. This will enable us to change the field.
Change it to the path of your main API
.csprojfile. In my case it's:**/StarWars.Api.csproj
Now it does a restore for the API project, and if the API has dependencies to other projects in the solution, it will restore for those as well.
Build
In the Build step we will change 3 things: the Path to project(s), the Arguments and the Working Directory.
Click again in the link icon next to Path to project(s) and point it to the
.csprojof your API again like in the restore step.In the Arguments step add a
--no-restoreflag to avoiddotnet builddoing a restore again:--configuration $(BuildConfiguration) --no-restoreExpand the Advanced menu and add the folder of your API project to the Working Directory. In my case, this:
src/StarWars.Api
I always use this format for my projects (and I believe most projects out there also use it):

My preference for project structure
You are not required to have this structure, but I think it works nicely and it's well organized. For instance, I like to put all my test projects under a test folder in the same hierarchy as the src folder.
Test
In the Test step, I specify the projects I want to test. A big solution often has multiple projects, and you probably also have separate builds for each of them. In this case, it makes more sense to specify each test project to run.
Publish
The Publish step was where I got caught up the first time I tried to set up my build pipeline. You can pretty much use the defaults, and it will work just fine. The problem is: it publishes the artifacts with very weird names. For example:
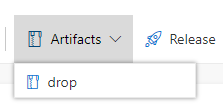
Example of an artifact name without context
I couldn't figure out a better artifact name using the default options. Artifact names should be meaningful and include information like the build number. I eventually used these steps to change the artifact name:
Uncheck the Publish Web Projects checkbox and add again the path to the API project:
**/StarWars.Api.csprojIn the Arguments paste this:
-c $(BuildConfiguration) -o $(Build.StagingDirectory)/ci-build --no-build
The -c command will tell Azure DevOps to use the BuildConfiguration variable. By default the variable is set to release, but you can change it in Variables tab on this page.
The -o argument specifies the location of the publish output. In my example, I specified it to publish into the pre-defined Build.StagingDirectory available in Azure DevOps plus into the ci-build folder. If you don't specify the ci-build folder, it will create a folder for it.
And, of course since we have built the project already, no need to do it again. So, skip the --no-build.
I also unchecked the Zip Published Projects and Add project name to publish path. We'll create our own zip in the next step.
Expand again the Advanced menu and set the Working folder again as we did in the Build step.
These steps should result in something like this:
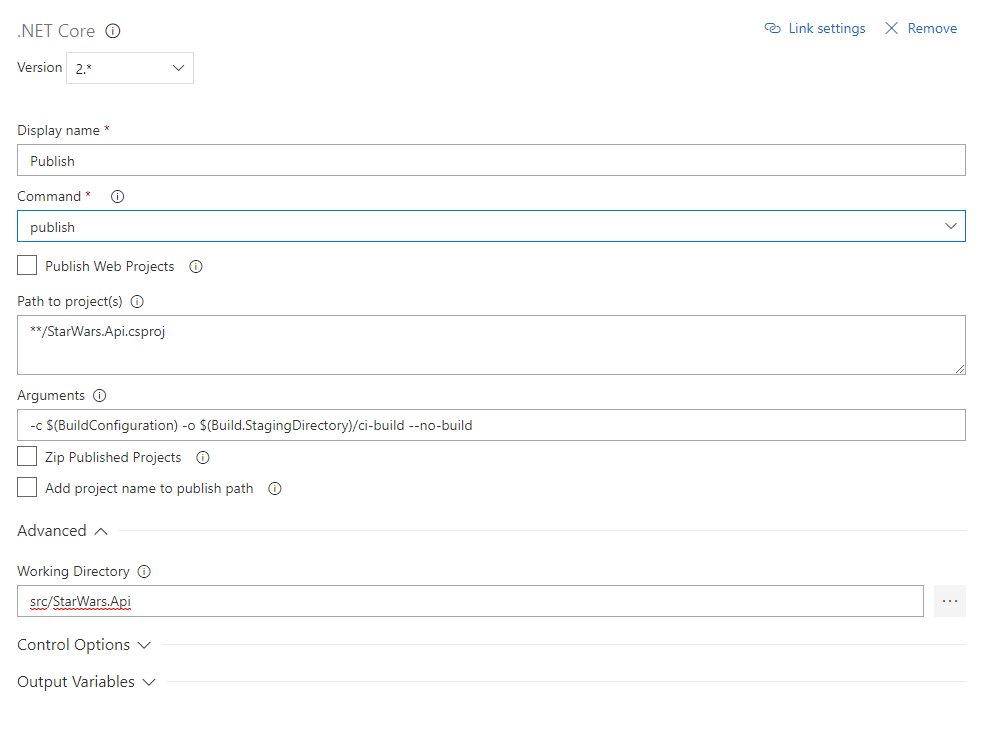
Publish step
Archive the publish output
Now that we have the outputs from our dotnet publish command, we need to archive it.
Click on the + button near Phase 1.
Select the Archive Files option. You can search for it if not visible.
Choose a name for the step, e.g., Archive Publish Output.
In the Root folder or file to archive add the path to the
publishoutput files configured before:$(Build.StagingDirectory)/ci-buildI don't want to prepend the root folder name in the zip, since I'd like my files to be at the root. So I unchecked the Prepend root folder name to archive paths checkbox.
In the Archive file to create is where we configure the name of the zip artifact. I changed mine to:
$(Build.ArtifactStagingDirectory)/starwars-api.$(Build.BuildNumber).zip. Make sure also to mark the Replace existing archive just in case.
This step grabs the files produced from the publish step available in $(Build.StagingDirectory)/ci-build and zips them with a name consisted of starwars-api.buildnumber.zip. I used the Build.BuildNumber variable exposed by Azure DevOps to construct that name. Note that I also hard-coded the starwars-api part, but you can also set a variable for that, or use one of the many predefined ones, like the build name for instance.
The archive step should look like this:
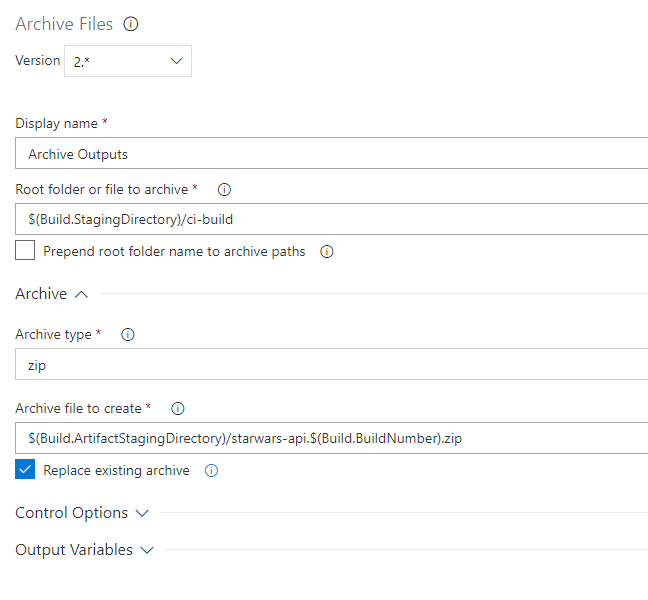
Archive step
Publish Artifact
In this step we are just picking up the .zip file, and moving it to the appropriate folder in Azure DevOps. Since we changed the defaults, we need to change some fields here as well to match our new artifact name/path:
Change the Path to publish to:
$(Build.ArtifactStagingDirectory)/starwars-api.$(Build.BuildNumber).zip. This will publish our zip to that location.In the Artifact name field add again the artifact name we created:
starwars-api.$(Build.BuildNumber)Leave the rest with default values.
That's it for the build part! Now you can go to Pipelines → Builds → Queue, wait for it to finish and you should have a nice artifact.

Example of a meaningful build artifact
And if you click on it, you can download it to your machine:
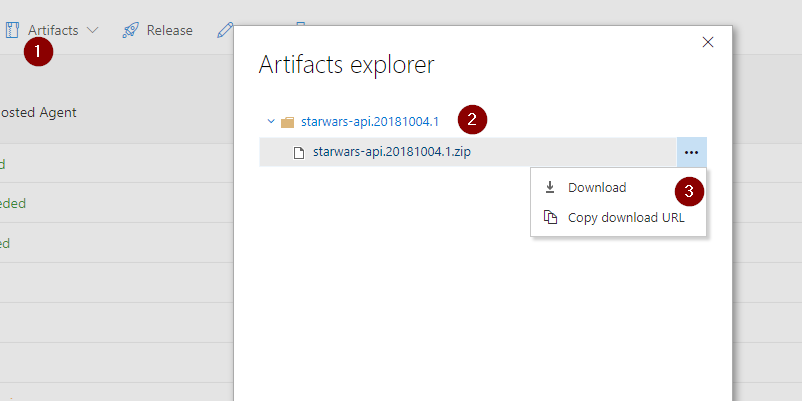
Downloading our artifact
Integrating Sentry and Azure DevOps
Now that your build pipeline is set up on Azure DevOps, you can integrate with Sentry unlock enhanced release tracking, informative deploy emails, and assignee suggestions for new errors.
In Sentry, navigate to Organization Settings → Integrations. (Note: only users with Owner and Manager permissions will have access to this page.)
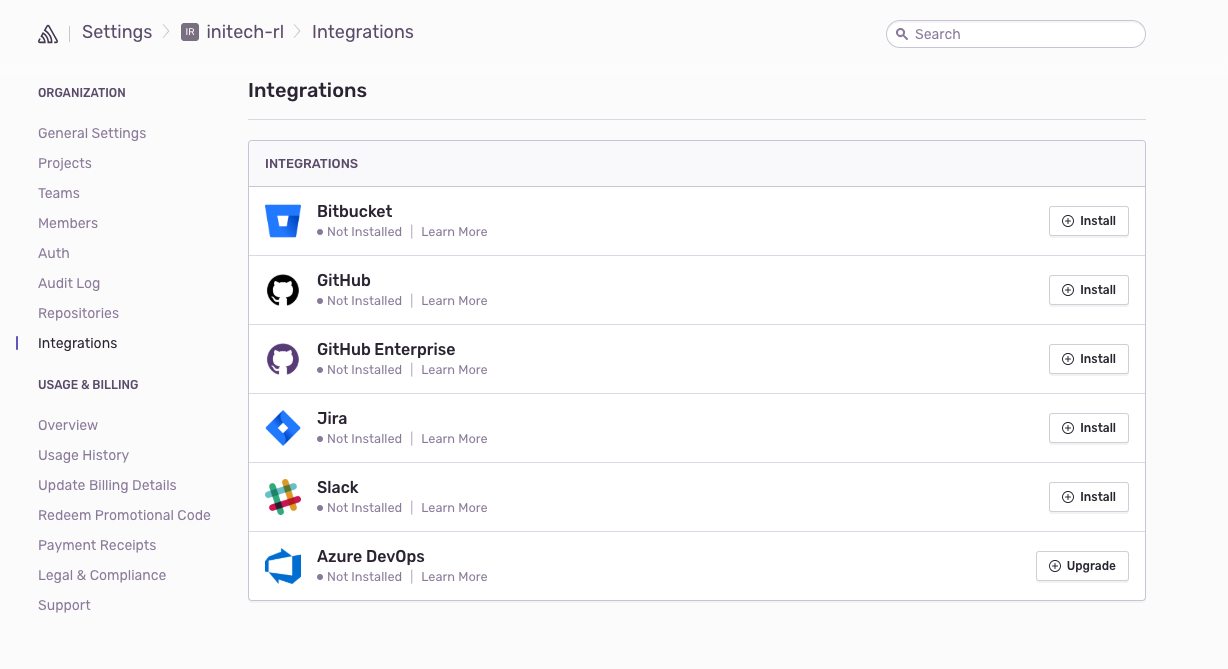
A list of your Sentry integrations
If you have the legacy VSTS integration installed, you’ll see a button next to Azure DevOps that says Upgrade. If you do not have the legacy VSTS integration installed, you’ll see a button that says Install. Click this button.
In the resulting modal, click Add Installation.
An Azure DevOps install window should pop up. Select the Azure DevOps account you’d like to link with Sentry, and press Submit.
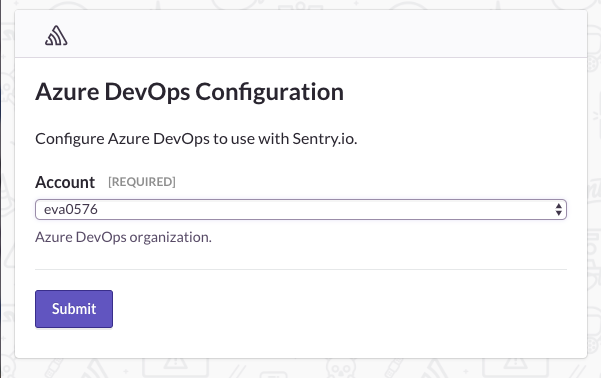
Select the Azure DevOps account to link with Sentry
Read more about the features of this integration here, and learn how to configure those features here.
You can also check out Joao’s original post, ping him with your questions, and read about his other adventures in .NET on his blog.


