Tips for Optimizing React Native Application Performance - Part 2: Using Sentry SDK for Performance Monitoring
Tips for Optimizing React Native Application Performance - Part 2: Using Sentry SDK for Performance Monitoring
Monitoring performance in front-end applications is vital. It focuses on the areas of the application users experience. These areas are slow rendering or frame rate, network request errors, and unresponsive user experience. Your application's users expect the experience of using the application to be fast, responsive, and smooth.
In the first article of this series, we discussed some tips for optimizing your React Native application performance. In this part (2), we're going to explore how to monitor performance issues in your React Native application's codebase.
In this tutorial, let's learn how to integrate Sentry SDK in a React Native application and enable React Native performance monitoring.
Pre-requisites
This tutorial requires that you are familiar with the fundamentals of React Native and JavaScript in general. If you don't already have it setup, please follow these instructions to set up a React Native environment on your local machine.
Getting Started with Sentry
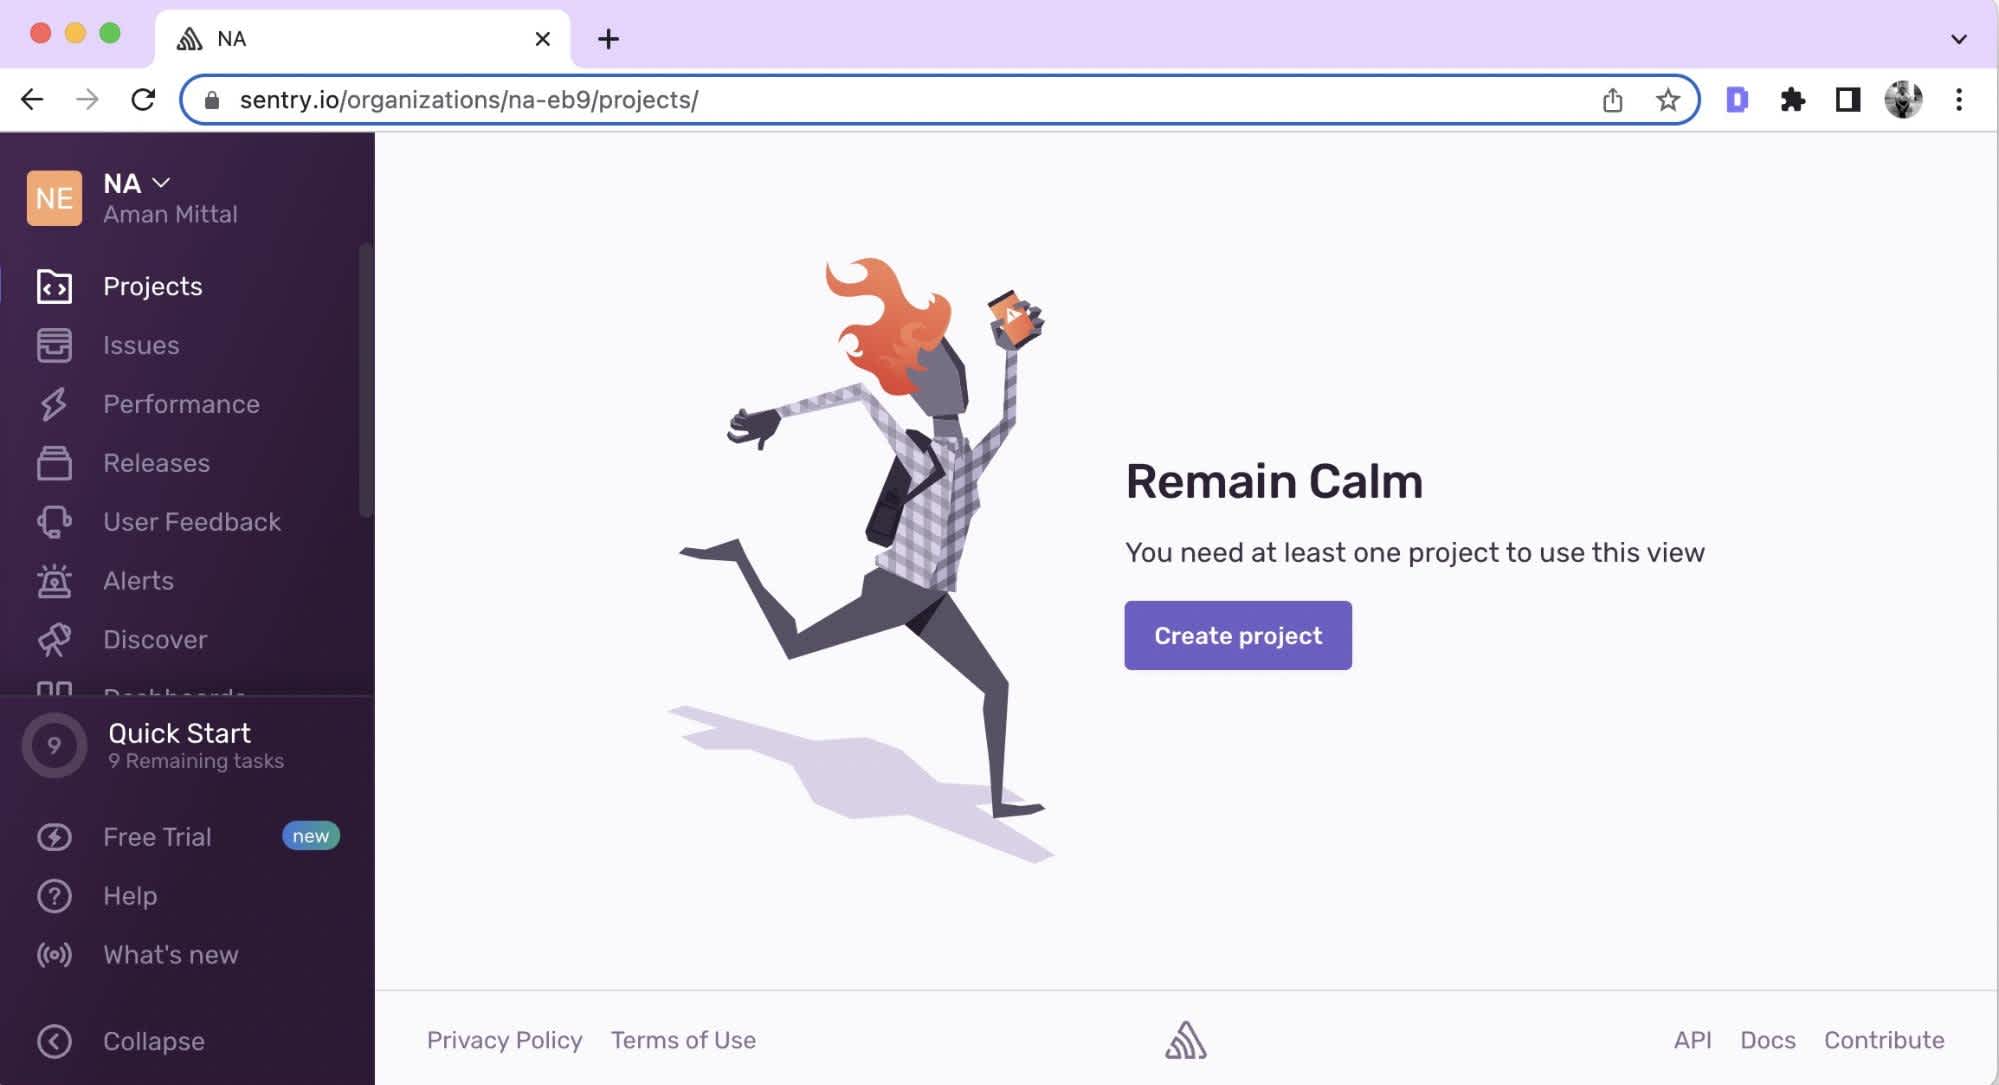
Begin by creating an account, and soon after, click the Create project button.
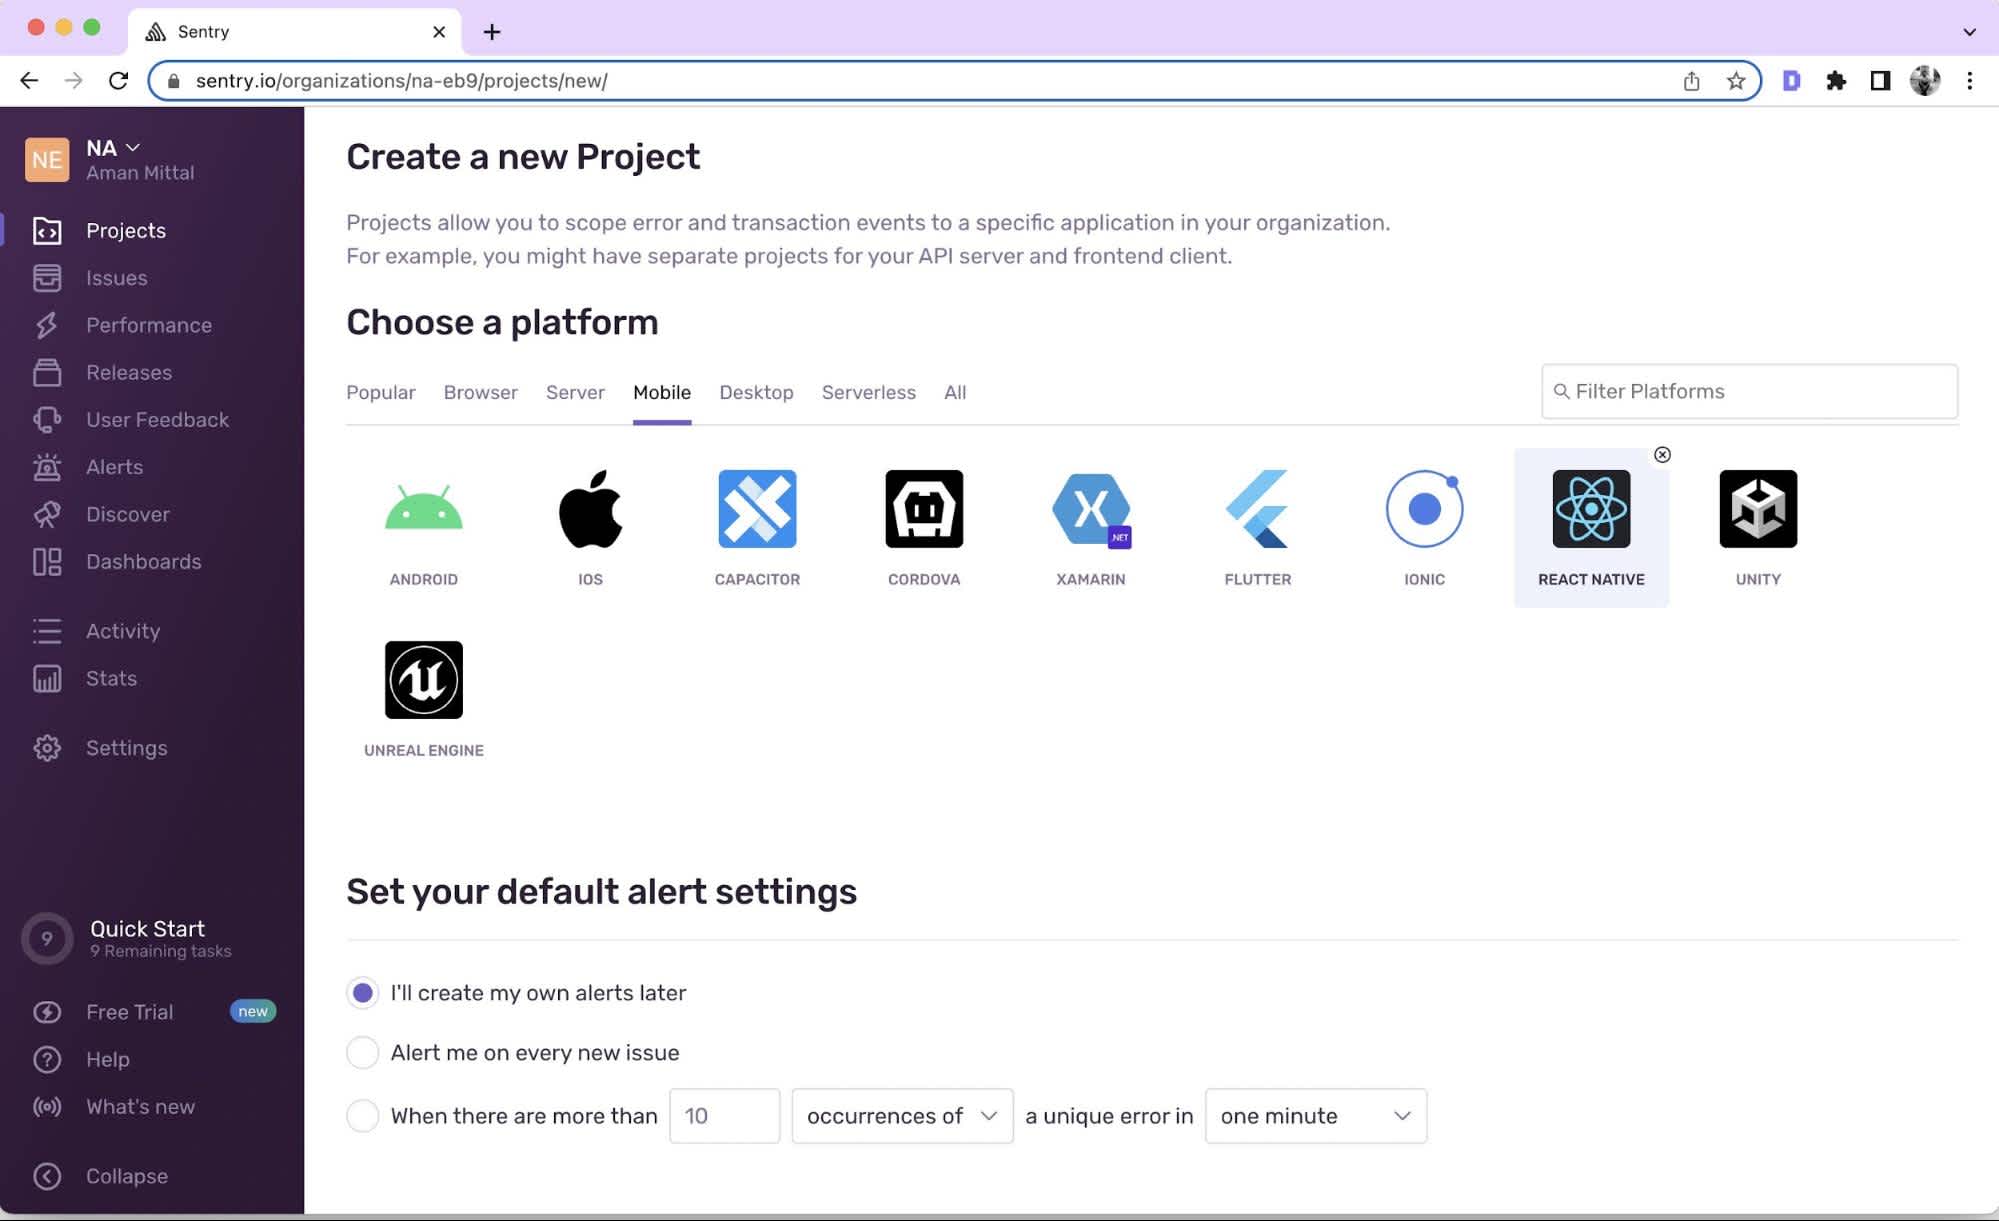
Next, select the platform and framework you want to use. In this case, we are using a mobile platform and React Native.
The last step is to give your Sentry project a name. Once you're done, click the Create Project button.
Creating a React Native app
Open up a terminal window, and let's create a new React Native application:
npx react-native init rnBooksStore
cd rnBooksStoreYour application has to use a routing library to enable routing instrumentation later. For this app, let's install the react-navigation library:
yarn add @react-navigation/native @react-navigation/native-stack react-native-screens react-native-safe-area-contextAfter installing the React Navigation library, make sure to follow instructions from its official documentation for linking the library for both iOS and Android.
Creating screens
In this section, let's create a mini book store. The first screen will be the Home screen. It renders a large list of books coming from the API endpoint. To illustrate the slow frame rate, the screen component uses ScrollView instead of FlatList.
I'll be using a long list of book titles from a mock API endpoint: https://example-data.draftbit.com/books?_limit=400.
Create an src/screens/ directory and inside it, create a HomeScreen.js file with the following code:
import React, { useState, useEffect } from 'react';
import { View, StyleSheet, ActivityIndicator, ScrollView } from 'react-native';

import ScreenHeader from '../components/ScreenHeader';
import BookCard from '../components/BookCard';

const HomeScreen = () => {
  const [books, setBooks] = useState([]);
  const [cart, setCart] = useState([]);
  const [loading, setLoading] = React.useState(true);

  const addToCart = book => {
    setCart(cart => [...cart, book]);
  };

  const fetchBooks = async () => {
    try {
      const response = await fetch(
        'https://example-data.draftbit.com/books?_limit=400'
      );
      const json = await response.json();

      setBooks(json);
    } catch (error) {
      console.error(error);
    } finally {
      setLoading(false);
    }
  };

  useEffect(() => {
    fetchBooks();
  }, []);

  if (loading) {
    return (
      <View style={styles.loadingContainer}>
        <ActivityIndicator size="large" color="#0000ff" animated />
      </View>
    );
  } else {
    return (
      <View style={styles.container}>
        <ScrollView contentContainerStyle={styles.listContainer}>
          <ScreenHeader cart={cart} />
          {books.map(book => (
            <BookCard
              key={book.id.toString()}
              thumbnailUrl={book.image_url}
              title={book.title}
              authors={book.authors}
              shortDescription={book.description}
              addToCart={addToCart}
            />
          ))}
        </ScrollView>
      </View>
    );
  }
};

const styles = StyleSheet.create({
  container: {
    flex: 1,
    backgroundColor: '#fff',
    paddingHorizontal: 10,
  },
  loadingContainer: {
    flex: 1,
    justifyContent: 'center',
    alignItems: 'center',
  },
  listContainer: {
    padding: 10,
  },
  text: {
    fontSize: 24,
    fontWeight: '600',
  },
  headerCartContainer: {
    justifyContent: 'space-between',
    flexDirection: 'row',
    padding: 10,
  },
});

export default HomeScreen;
Creating custom components
The HomeScreen component uses two custom components. The first one displays the count of books when added to the cart. This component is called ScreenHeader. Create a src/components/ScreenHeader.js file with the following code:
import React from 'react';
import { View, Text, StyleSheet } from 'react-native';

const ScreenHeader = ({ cart }) => {
  return (
    <View style={styles.container}>
      <Text>Cart Items</Text>
      <Text
        style={[
          { fontSize: 20 },
          !cart.length ? { color: 'gray' } : { color: '#0000ff' },
        ]}
      >
        {cart.length}
      </Text>
    </View>
  );
};

const styles = StyleSheet.create({
  container: {
    justifyContent: 'flex-end',
    alignItems: 'flex-end',
    marginLeft: 10,
  },
});

export default ScreenHeader;
The second component renders the info of each book item. Create a src/components/BookCard.js file with the following code:
import React from 'react';
import { View, Image, TouchableOpacity, Text, StyleSheet } from 'react-native';

const BookCard = ({
  thumbnailUrl,
  title,
  authors,
  shortDescription,
  addToCart,
}) => {
  return (
    <View style={styles.container}>
      <View style={styles.flex}>
        <Image source={{ uri: thumbnailUrl }} style={styles.image} />
      </View>
      <View style={styles.itemInfoContainer}>
        <Text style={styles.title}>{title}</Text>
        <Text style={styles.author}>by {authors}</Text>
        <Text style={styles.description} numberOfLines={2}>
          {shortDescription}
        </Text>
        {addToCart && (
          <TouchableOpacity onPress={() => addToCart({ title })}>
            <View style={styles.buttonContainer}>
              <Text style={styles.buttonText}>Add To Cart</Text>
            </View>
          </TouchableOpacity>
        )}
      </View>
    </View>
  );
};

const styles = StyleSheet.create({
  container: {
    flexDirection: 'row',
    marginVertical: 10,
    paddingHorizontal: 10,
  },
  flex: {
    flex: 1,
  },
  image: {
    height: 125,
    resizeMode: 'contain',
  },
  itemInfoContainer: {
    flex: 3,
    paddingHorizontal: 10,
    justifyContent: 'space-between',
  },
  title: {
    fontWeight: 'bold',
    fontSize: 14,
  },
  author: {
    color: 'gray',
    fontStyle: 'italic',
  },
  description: {
    color: 'gray',
    fontSize: 12,
  },
  buttonText: {
    color: 'white',
    marginHorizontal: 4,
  },
  buttonContainer: {
    flexDirection: 'row',
    flexWrap: 'wrap',
    borderRadius: 12,
    padding: 8,
    alignSelf: 'flex-start',
    backgroundColor: '#0000ff',
    alignItems: 'center',
  },
});

export default BookCard;
Adding a Home stack navigator
Although we only have one screen in the example application, let's add a HomeStack navigator so we can learn how to create routing instrumentation configuration.
Create a src/navigation/HomeStack.js file with the following code:
import * as React from 'react';
import { createNativeStackNavigator } from '@react-navigation/native-stack';

import HomeScreen from '../screens/HomeScreen';

const Stack = createNativeStackNavigator();

const HomeStack = () => {
  return (
    <Stack.Navigator>
      <Stack.Screen name="Home" component={HomeScreen} />
    </Stack.Navigator>
  );
};

export default HomeStack;
Integrating Sentry SDK in React Native app
Sentry's SDK for React Native enables automatic crash reporting and performance monitoring. It captures these issues using the SDK within your application’s runtime.
Open up your terminal window to install and set up Sentry's React Native SDK:
yarn add @sentry/react-native
yarn sentry-wizard -i reactNative -p ios android

npx pod-install
The sentry-wizard takes care of initializing the Sentry SDK in the React Native App.{js|tsx} file and linking the SDK for both iOS and Android platforms. (Note: the automatic linking only works if your React Native project uses version 0.60 and above.)
By default, the Sentry SDK initialization adds a unique Data Source Name (DSN) string that monitors events in your application.
I'll modify the Sentry SDK initialization to add a tracesSampleRate property with a value of 1.0. This will enable the tracking of all events in the application. However, in production, ensure that the value of tracesSampleRate is lower than 1.0 to collect a uniform amount of sample data without reaching Sentry's transaction quota. You can learn more about sampling in Sentry's official documentation.
Here is an example of Sentry initialization of the App.js file:
import React, { useRef } from 'react';
import { NavigationContainer } from '@react-navigation/native';
import * as Sentry from '@sentry/react-native';

import HomeStack from './src/navigation';

Sentry.init({
  dsn: 'https://da5d189961d145fa91ce878346cce14c@o1267720.ingest.sentry.io/6461490',
  tracesSampleRate: 1.0,
});

const App = () => {
  return (
    <NavigationContainer>
      <HomeStack />
    </NavigationContainer>
  );
};

export default Sentry.wrap(App);
Wrapping the root component of the React Native app like Sentry.wrap() enables automatic performance monitoring. You can also use another high-order component called Sentry.withProfiler() to wrap the root component. It enables tracking the component's lifecycle as a child span of the route transaction.
Sentry.withProfiler(App);Enabling routing instrumentation
Routing instrumentation in Sentry's SDK supports the latest version of React's Navigation library. The routing instrumentation creates a transaction on every route change. So let's first add the configuration to enable the routing instrumentation.
In the App.js file, create a navigation reference. It connects to the Navigation container. The onReady() method on NavigationContainer will register the navigation container with the routing instrumentation.
Here is what the App.js file looks like after modification:
import React, { useRef } from 'react';
import { NavigationContainer } from '@react-navigation/native';
import * as Sentry from '@sentry/react-native';

import HomeStack from './src/navigation';

const routingInstrumentation = new Sentry.ReactNavigationInstrumentation();

Sentry.init({
  dsn: 'https://your-dsn-string',
  integrations: [
    new Sentry.ReactNativeTracing({
      routingInstrumentation,
      // ... other options
    }),
  ],
  tracesSampleRate: 1.0,
  enableAutoSessionTracking: true, // For testing, session close when 5 seconds (instead of the default 30) in the background.
});

const App = () => {
  const navigation = useRef();

  return (
    <NavigationContainer
      ref={navigation}
      onReady={() => {
        routingInstrumentation.registerNavigationContainer(navigation);
      }}
    >
      <HomeStack />
    </NavigationContainer>
  );
};

export default Sentry.withProfiler(App);
Performance Monitoring in action
Open two terminal windows. In the first window, initiate the React Native packager. In the second one, build the application for either iOS or Android. I'll be using the iOS simulator to run the application.
# first terminal window
npx react-native start
# second terminal window
# for iOS
npx react-native run-ios
# for android
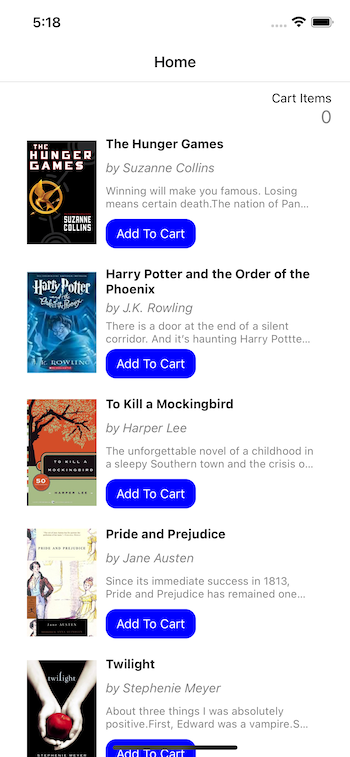
npx react-native run-androidAfter the application is built, you will get the following result:
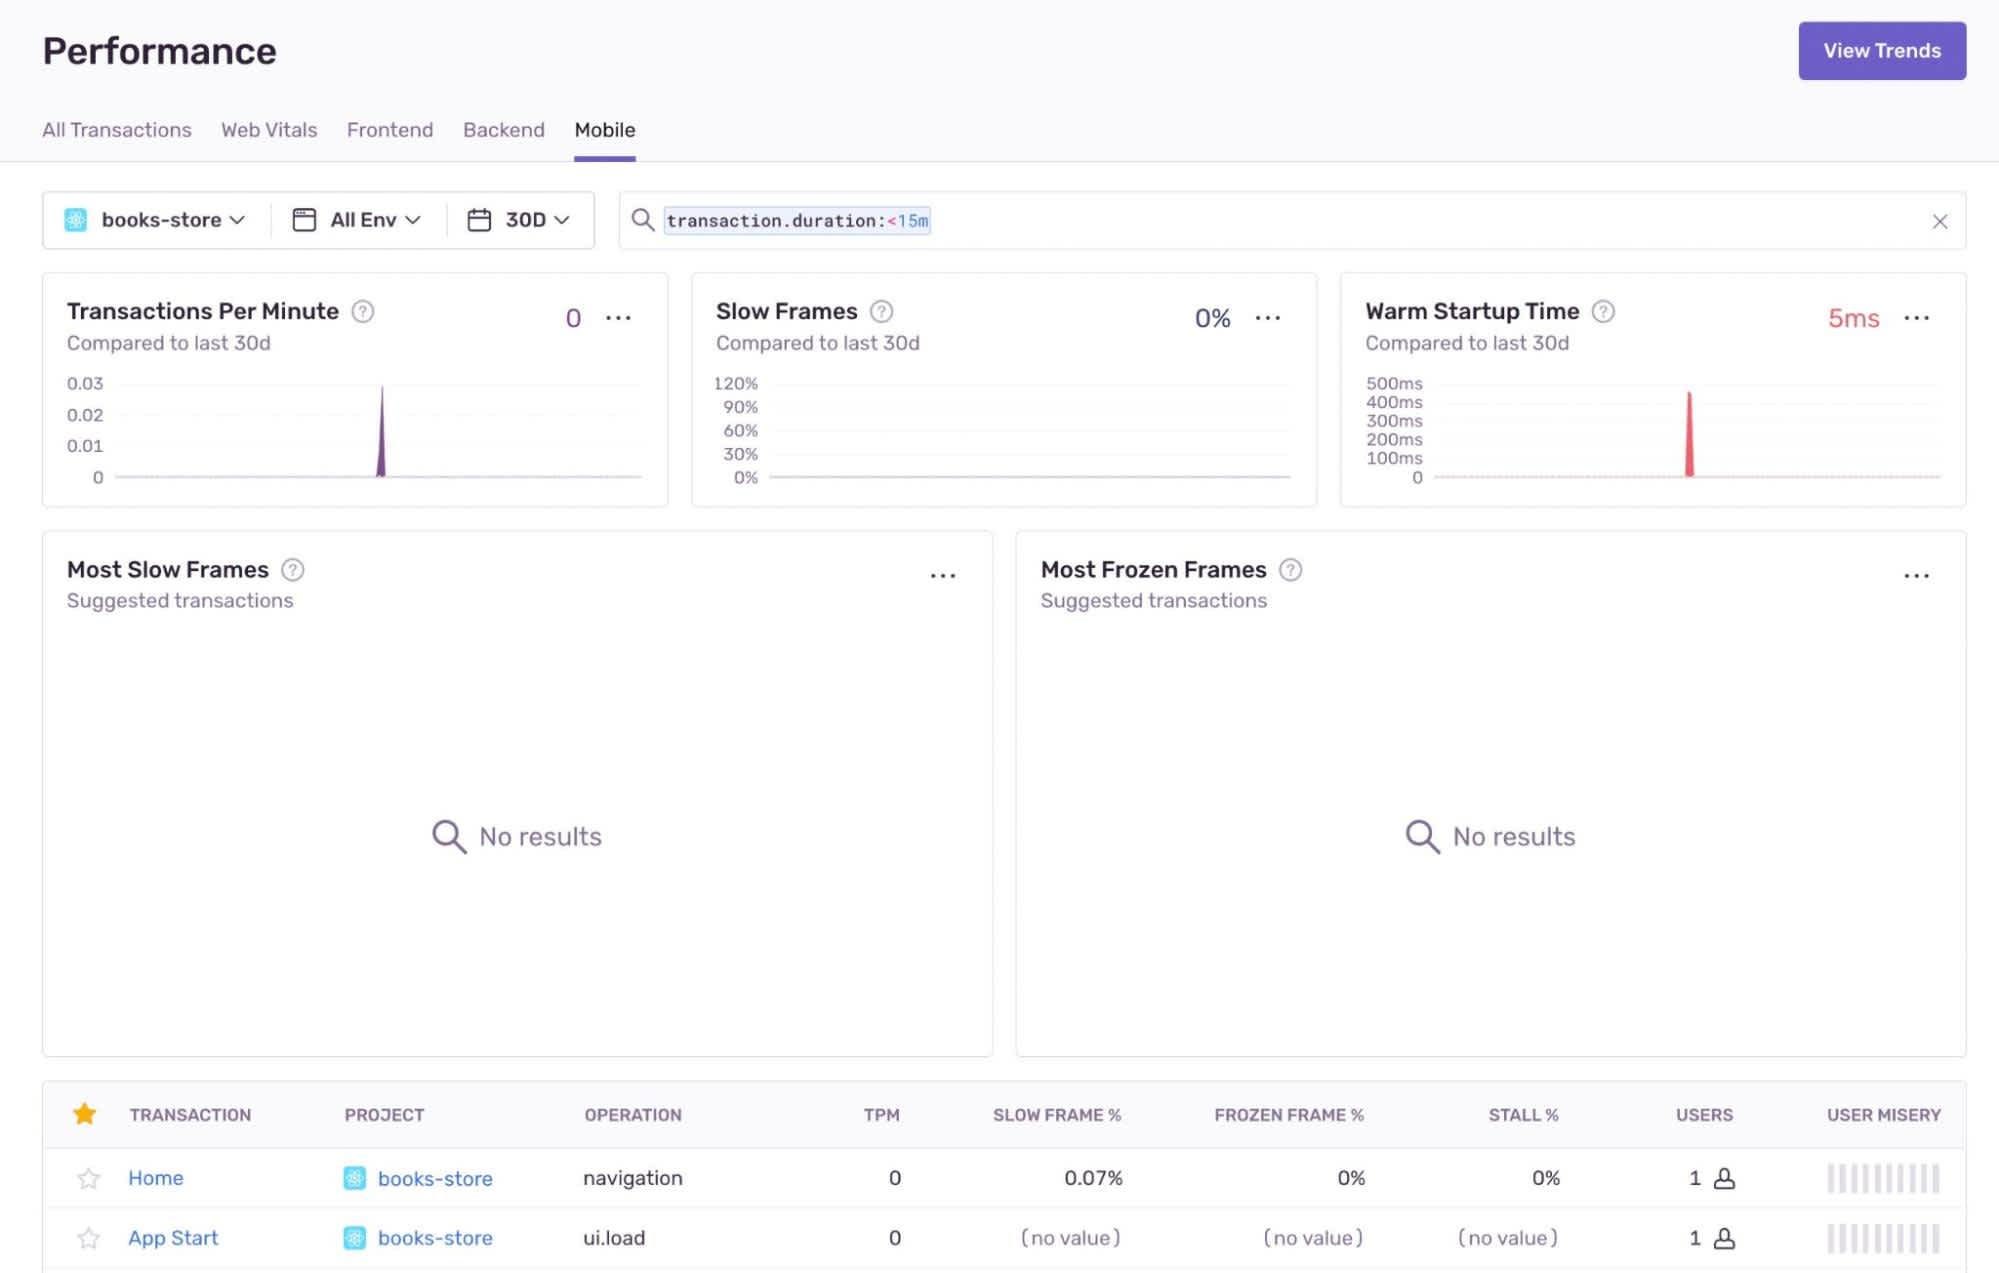
Now, if you head back to Sentry's dashboard and navigate to the Performance tab from the sidebar, you will notice it has started to monitor events in our React Native app.
You can click the Mobile tab for the performance overview. It contains information about slow and frozen frames, as well as app start.
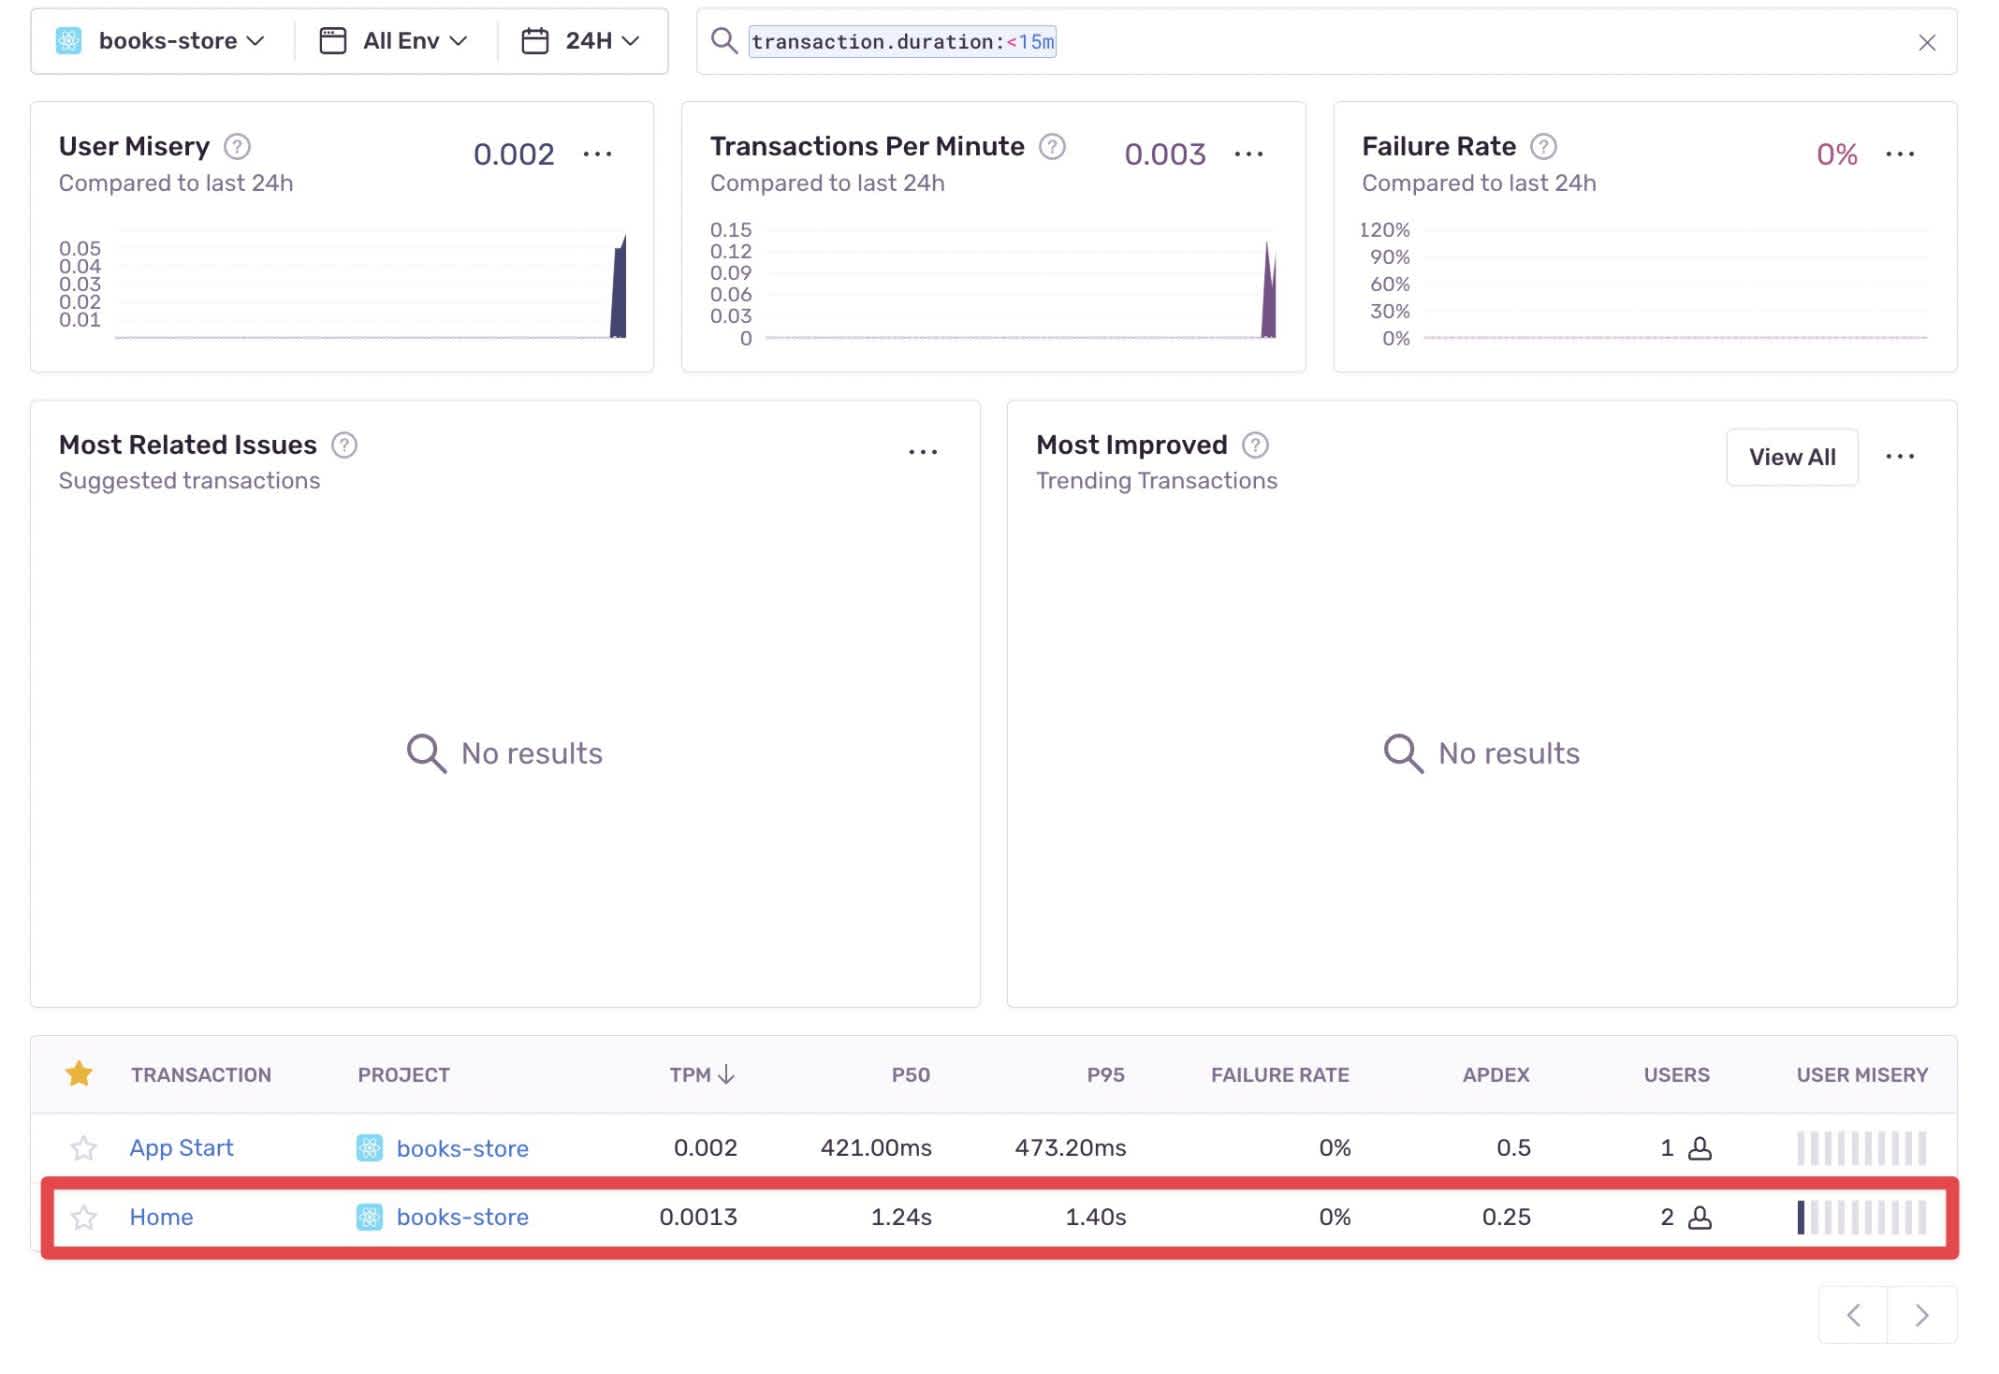
In the screenshot below, you can see the app has started to monitor App start and Home event:
The Home is the Home screen; since we have routing instrumentation enabled, Sentry will pick up and display the exact screen name.
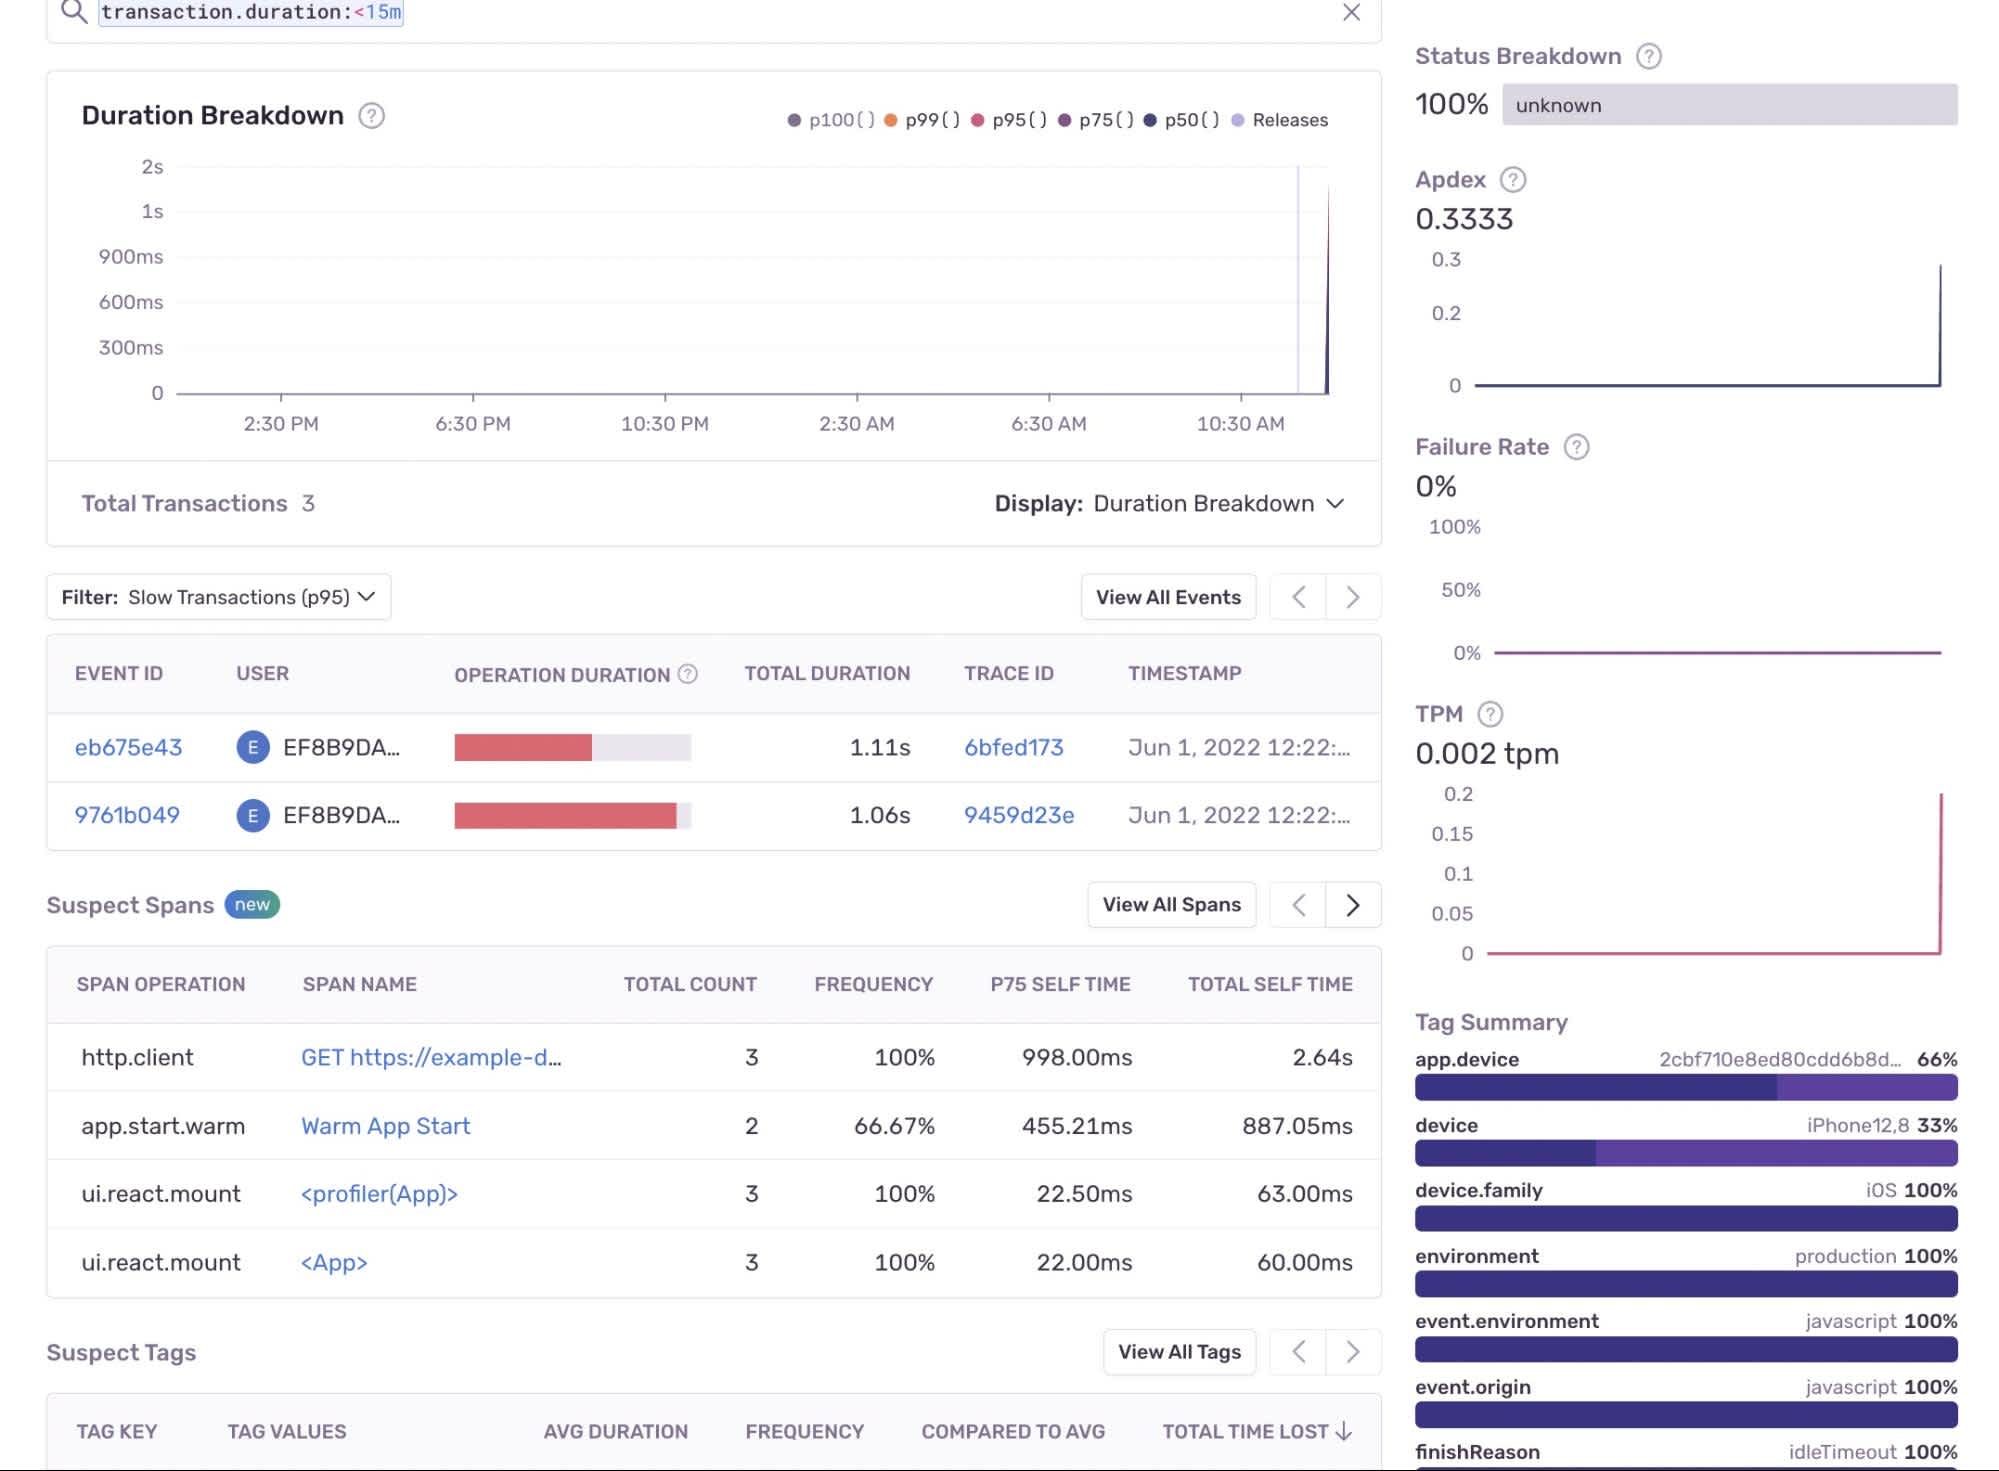
If you click the transaction, you'll get additional details about what is happening. For example, it will tell you that the starting time of the app is warm from the event app.start.warm.
On iOS devices, Apple recommends that your app should take a maximum of 400ms to render the first frame. However, our start-up time was a little over 450ms as seen in the screenshot.
Fetching data from the HTTP request (http.client) also takes a little less than one second. Increasing the number of books coming from the API endpoint will increase the start-up time. Thus, large lists of data using a FlatList component can significantly improve the start-up time. Also, pre-fetching data from the API endpoint using a library like react-query can also help improve the start-up time on app restarts.
We can also optimize the BookCard component by caching the image or using a useCallback hook to stop re-rendering the parent component each time a book is added to the cart.
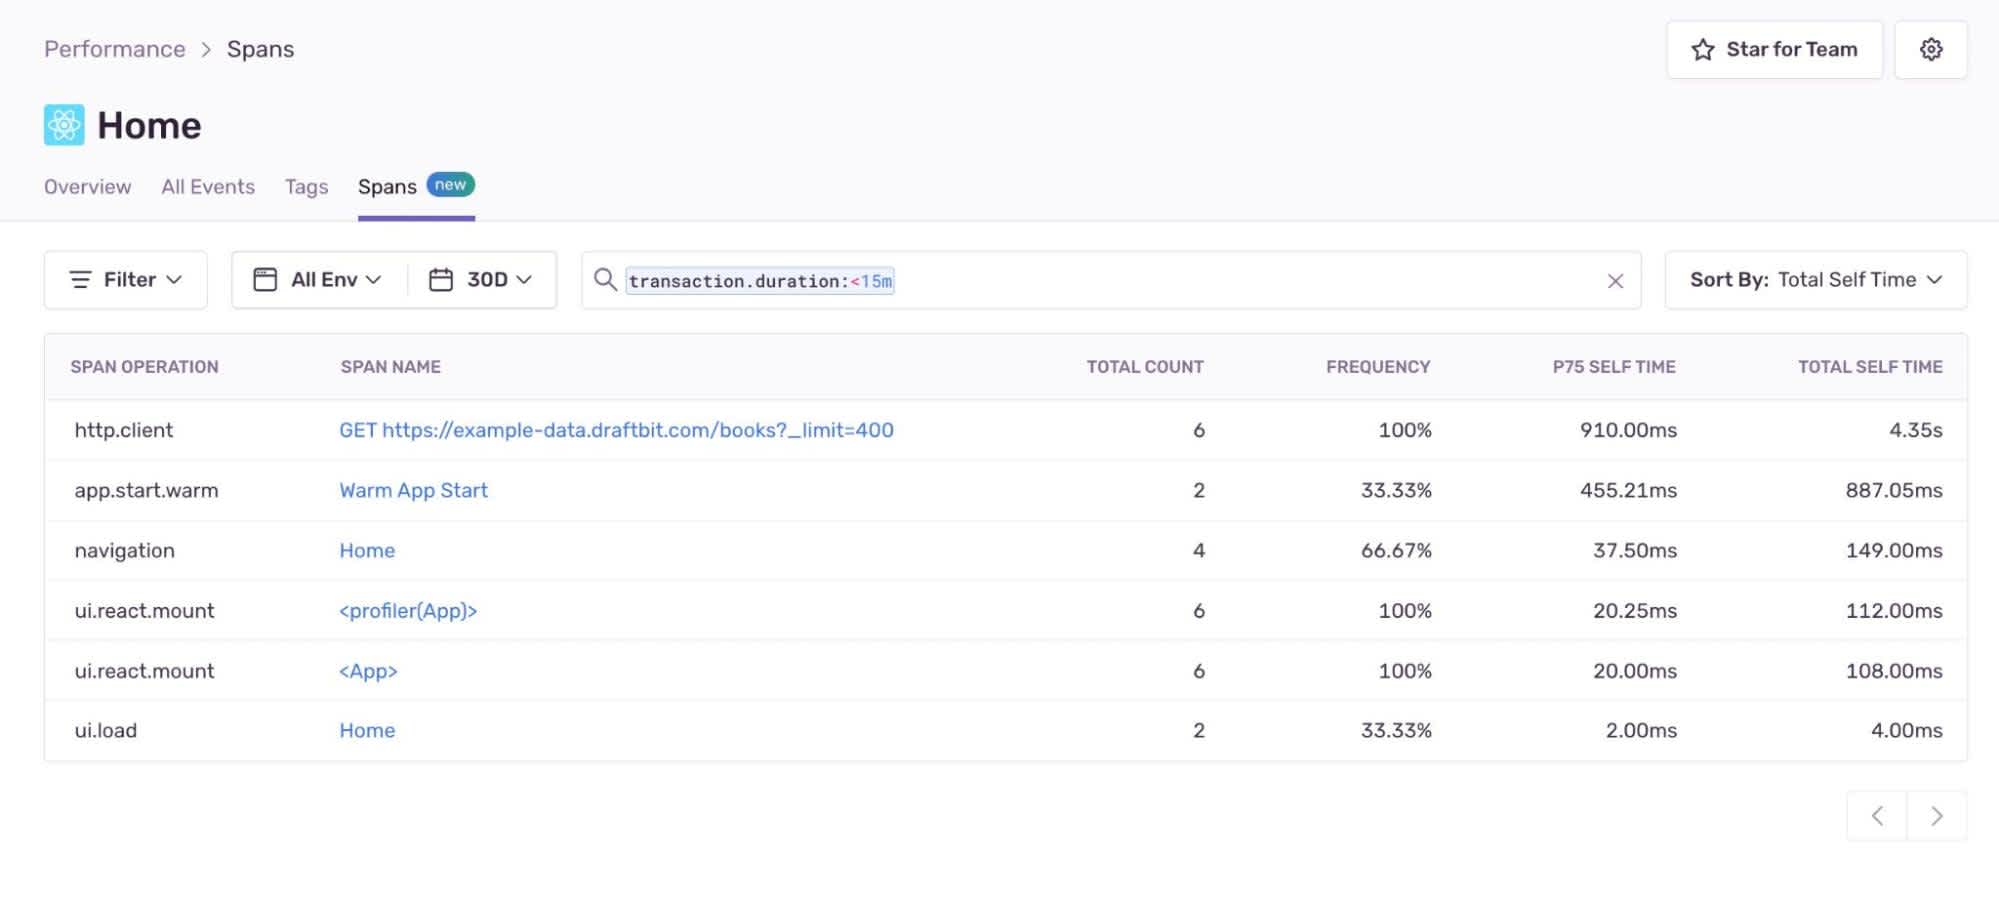
By clicking on “Suspect Spans”, you can view all the transactions in the application:
Conclusion
Using a powerful tool like Sentry allows you visibilty into your users' experiences and provides an understanding of how you can improve it. In this article, you set up and integrated the Sentry SDK in a React Native application and learned how to monitor the application for performance with routing (navigation) enabled and network calls. Mobile application monitoring is a crucial aspect to engage app users and provide a seamless experience iteratively. It is only possible when these insights are available to us.

