Unity Tutorial: Developing Your First Unity Game - Part 3
Unity Tutorial: Developing Your First Unity Game - Part 3Welcome to the final article in this Unity series where we are developing a Unity game. You can check out my intro article, where I dive into Unity editor basics, or dive right into part 1 of our “Developing your first Unity game”, where we begin developing our Frog Unity game and I dig a bit deeper into a couple important game object components, and then part 2 of our “Developing your first Unity Game”, where I walk-through adding a falling effect, instantiating several prefabs in random places, & making and displaying a score counter.
In this article, we are going to create a main menu, add sounds to the game, animate buttons, pause, & finally, exit the game.
The following should be installed on your computer to follow along this tutorial:
Unity
Unity Hub
Visual Studio
In this tutorial, Unity Version “2020.3.23f1” is used.
How to create a main menu
To create a main menu for our game, we can add a new scene or create a popup window in the same scene. I personally prefer adding a new scene because the larger the game becomes & the more game objects you have in a scene, the heavier the scene is. You will have the opportunity to add more features to the game later.
Let’s add a new scene and name it “Menu”. We will use the same background we used in the game scene. Return to the TapGame scene and copy the canvas and the EventSystem from the hierarchy, and paste it in the "Menu" scene as shown below. This will save us a lot of time. If we want, we can edit the background image later.
Now we have the same background image, but we need to center it. Do so by adding the Main Camera in the Render Camera field in the inspector of the canvas (as shown below):
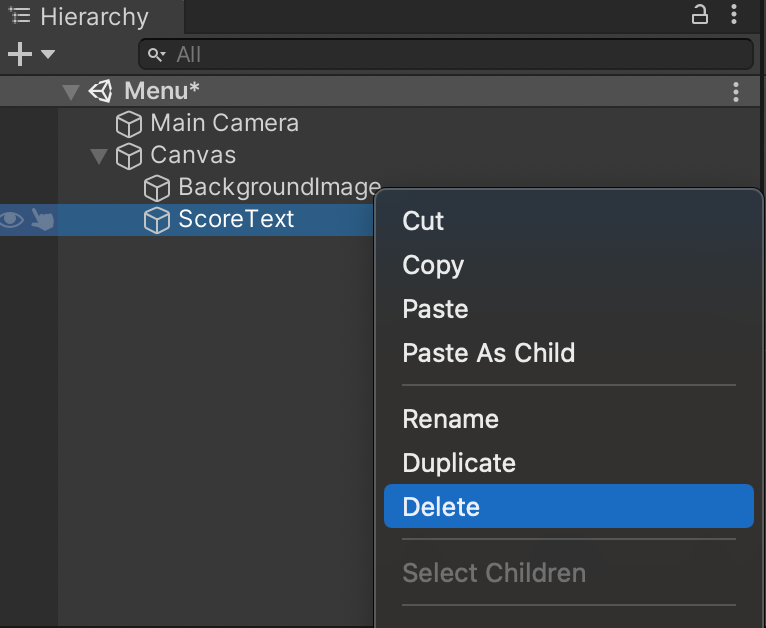
Since we don’t need the text object inside the canvas object, we can delete it.
Now we’re ready to make the main menu scene. First, let’s add an image for the game’s name. Drag the image from your assets folder and drop it into the hierarchy as shown below. Move the image towards the top-center part of the scene:
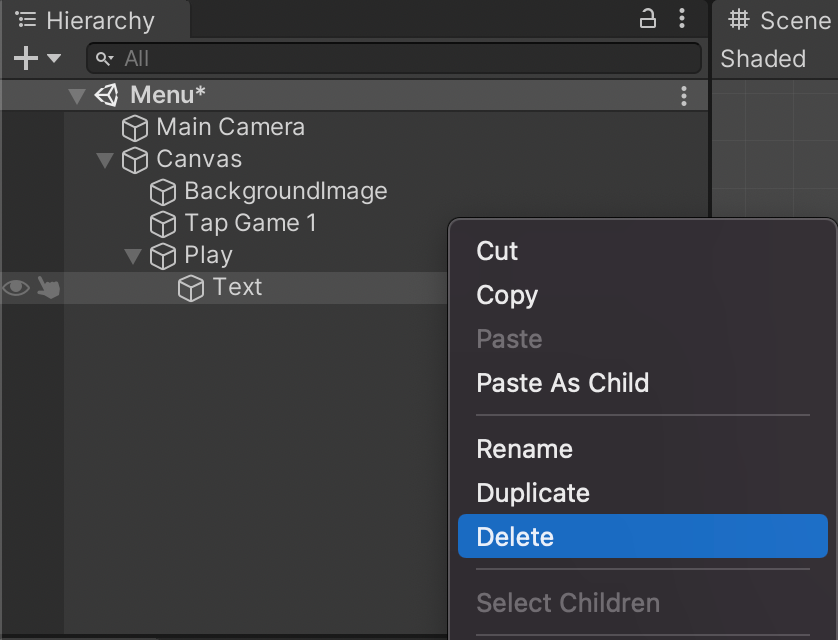
We’ll next add a play button that will take players to the game scene so they can start playing. To do so, right click in the hierarchy, add a button, and name it “Play”. You can either add an image as a sprite for the button and delete the text object as shown in the image below, or use it as it is. I will use a play button image and delete the text object.
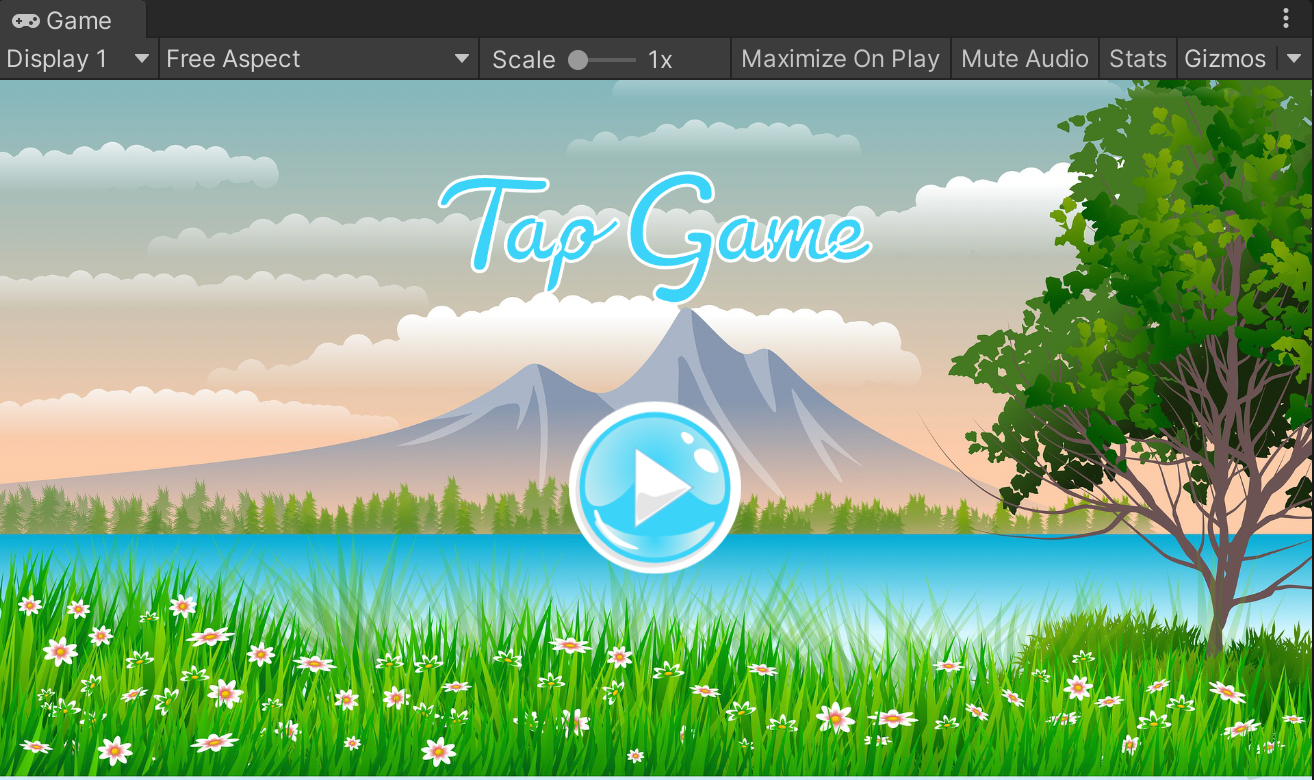
The game should look something like this:
Next, we'll animate our play button.
How to animate buttons
Unity has a great animation tool which we're going to use on the play button we just added. We can change a lot of properties for the button; for example, rect Transform properties, image properties, or button properties. We will scale the play button down, then scale back to its original size when it’s clicked to create the effect that we’ve pressed and released. After the animation ends, we want players to enter the game scene.
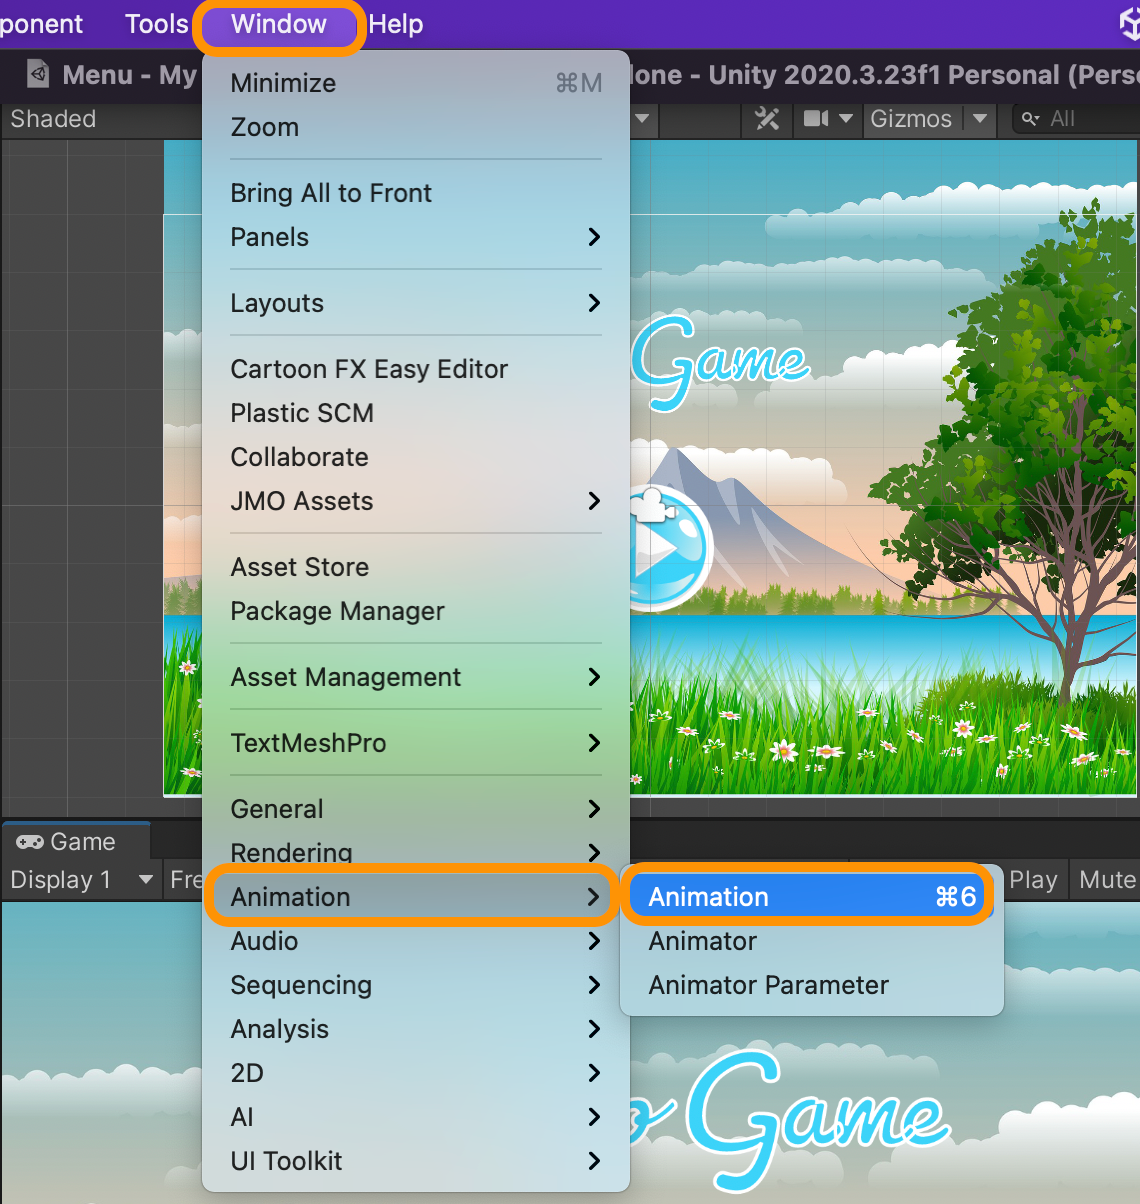
To add an animation to a button, simply open the animation tool from Window > Animation > Animation:
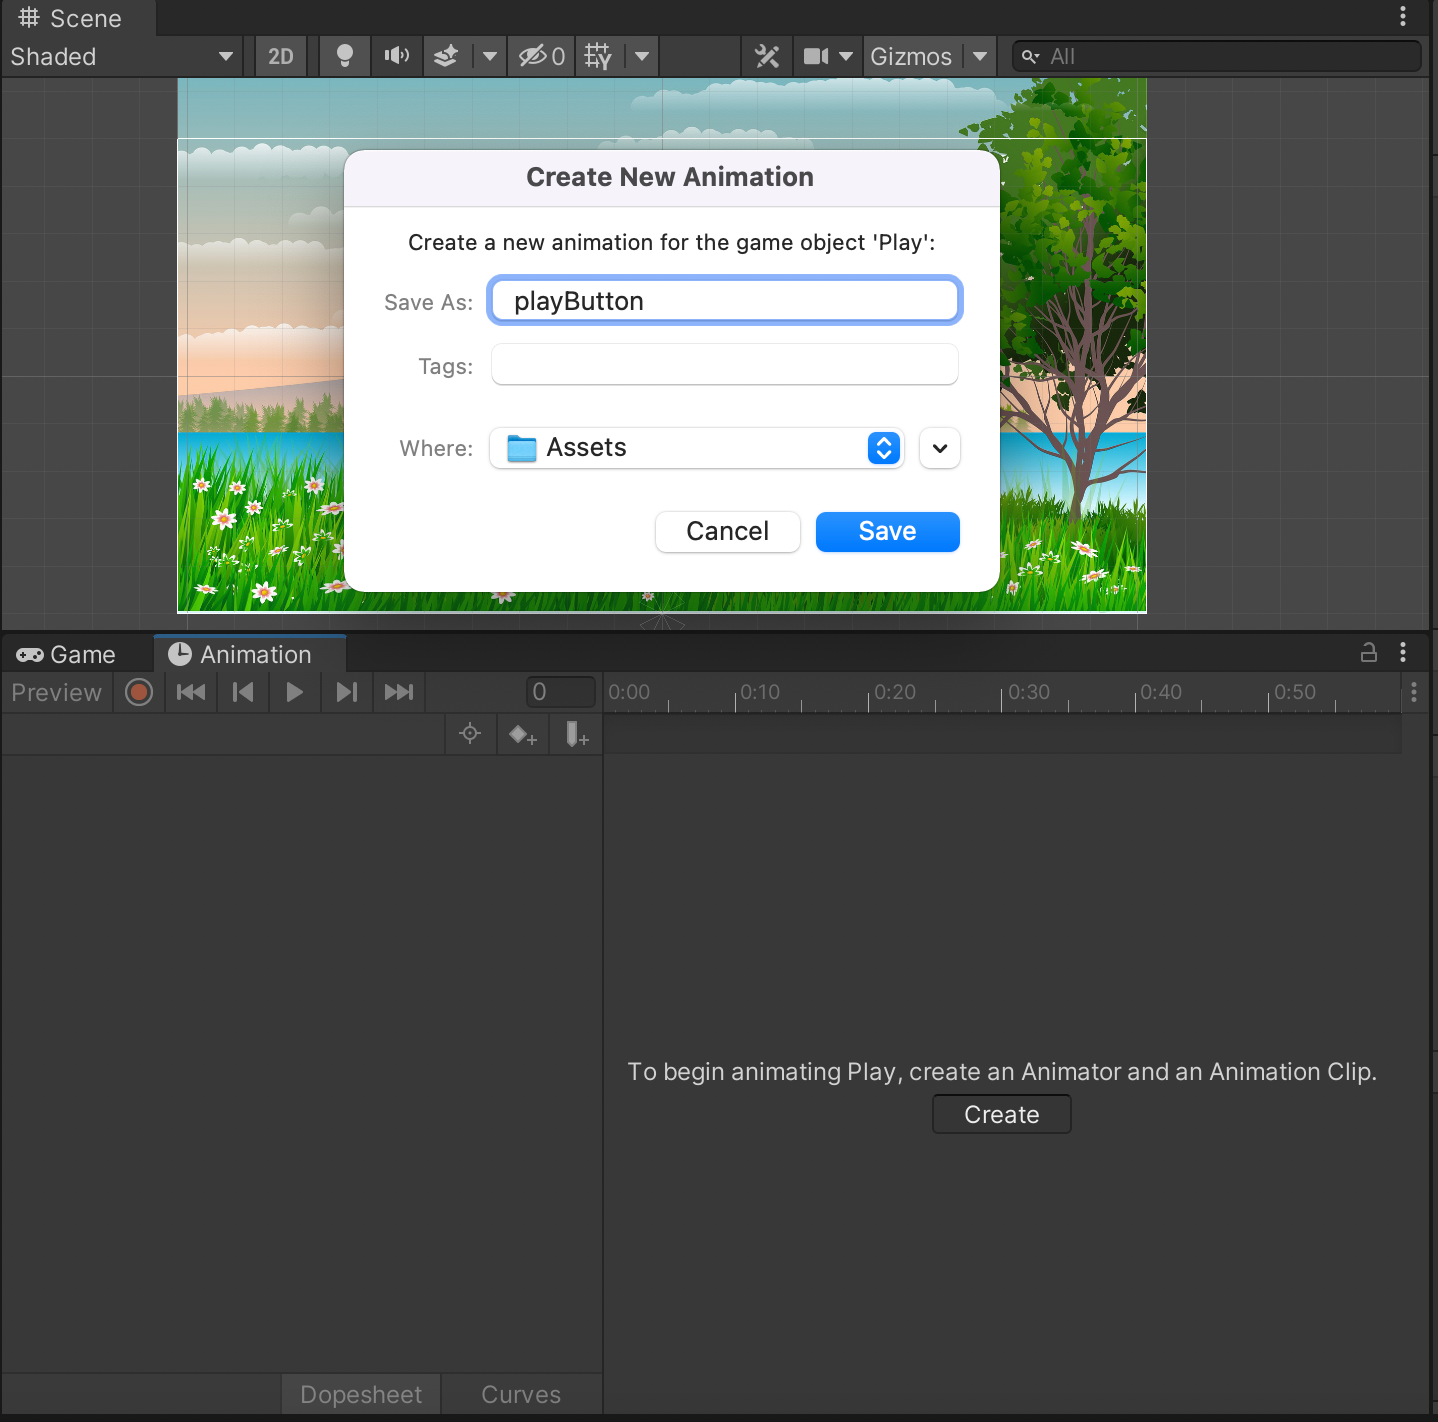
While the play button is selected in the hierarchy, click on create in the Animation tab that opens and change the name to “playButton”.
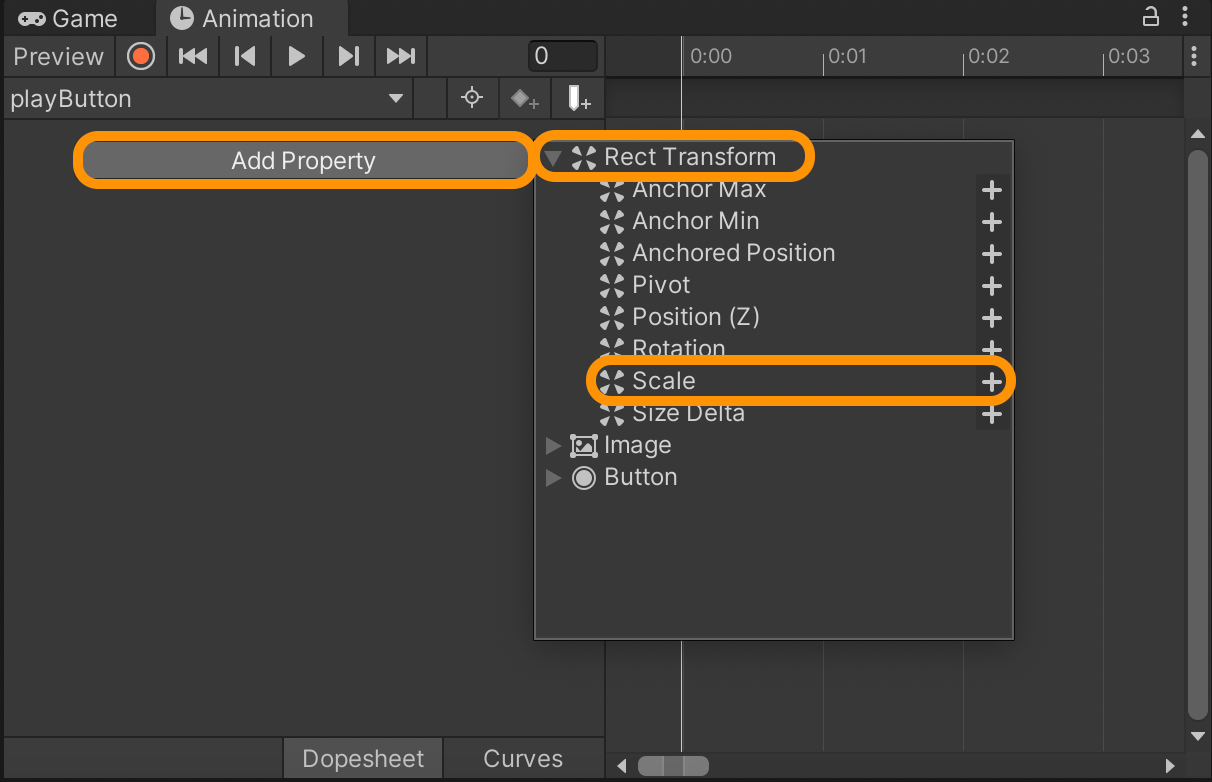
An animator component, which is the controller of the animationk, will be added automatically into the button object. Add a scale property to the animation as shown below:
Let’s make the animation duration 0.10 seconds long since we don’t want too long of a time gap between the button click and the action, which is transitioning to the game scene; but feel free to increase or decrease the animation duration to a value you prefer.
Next we need to create a clicking effect. To do so, we will reduce the scale value by 50% to 0.05 seconds so that the first half of the duration, the button’s size decreases, and the second half of the duration, the button’s size returns to its original size. To do that, copy the keys (the four small diamond shapes) and paste them at the 0.05 and 0.10 second intervals. Those keys we just pasted will change the details of the property. Now we can change the scale of the button to get the animation we desire. To do so, select the keys at the 0.05 second interval, which is half the animation duration, and change the scale value for x & y from 1.5 to 1.0 as shown below:
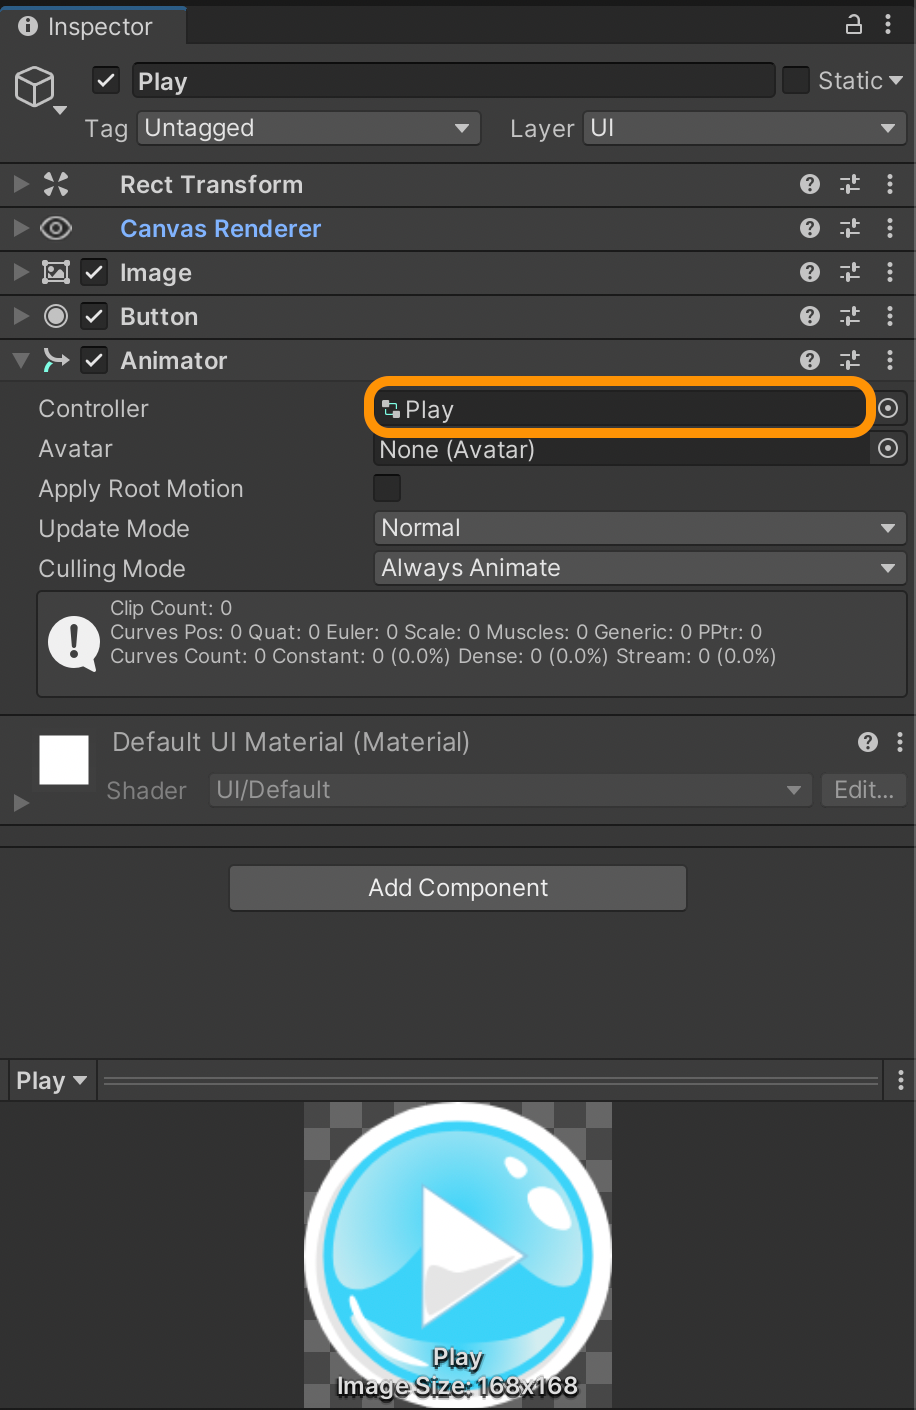
The animation will loop and start immediately after we click the play button. However, we don’t want the animation to loop; we just want it to play once. We also want to jump to the game scene after the animation ends. To do so, we need to create some transitions, so let’s double click on the play controller in the inspector as shown below and get started.
The animator controller window will open, & we can change when the animation will be activated. Right-click in the animator window and add a new state. Then, make two transitions from (and to) the new state & the playButton animation so that we can control the animation with these two transitions. Finally, since we don’t want the animation to start immediately when we start the scene (we only need it to start when we click on the button) we will set the new state as the default state:
Next, since we want the animation to begin when we click, we need to send a signal or make a clicking event, and to do so, we need to add a trigger (which we'll name “Active”) to the transition from the new state to the playButton state. This will trigger the animation to start. To transition from the new state to the animated state, uncheck the “has exit time” checkbox.
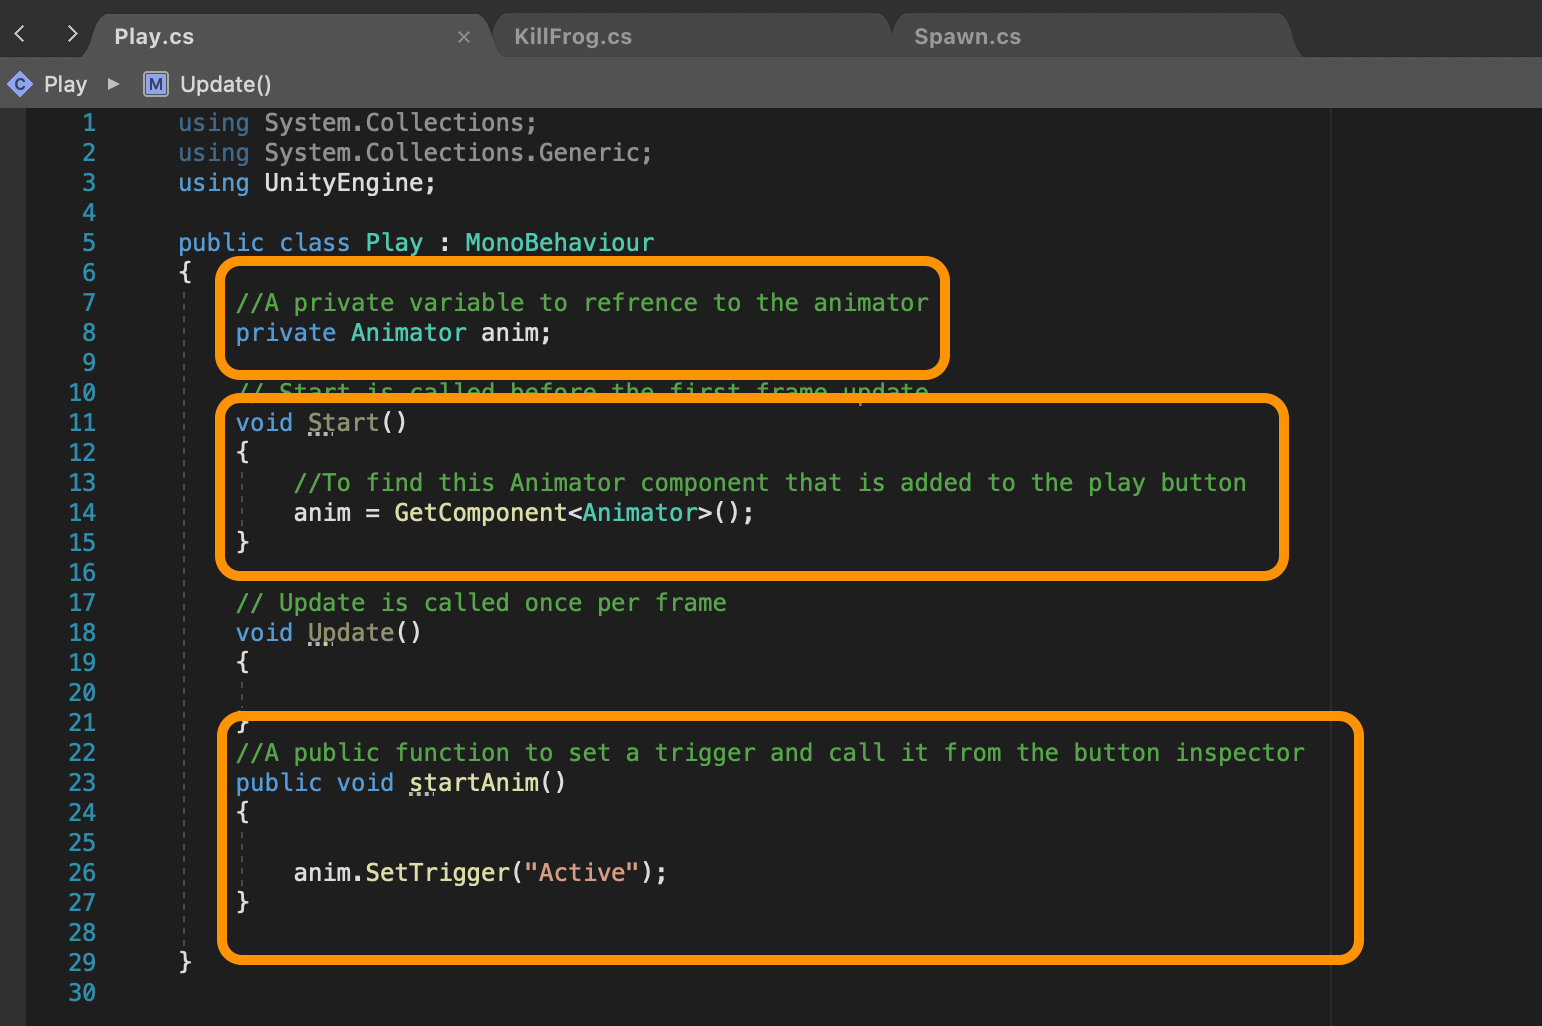
We’ll then need to activate the trigger by writing a C# script, which we'll name "Play", and attaching it to the play button. Write the following code in the file:
Let�’s run the game and click on the play button.
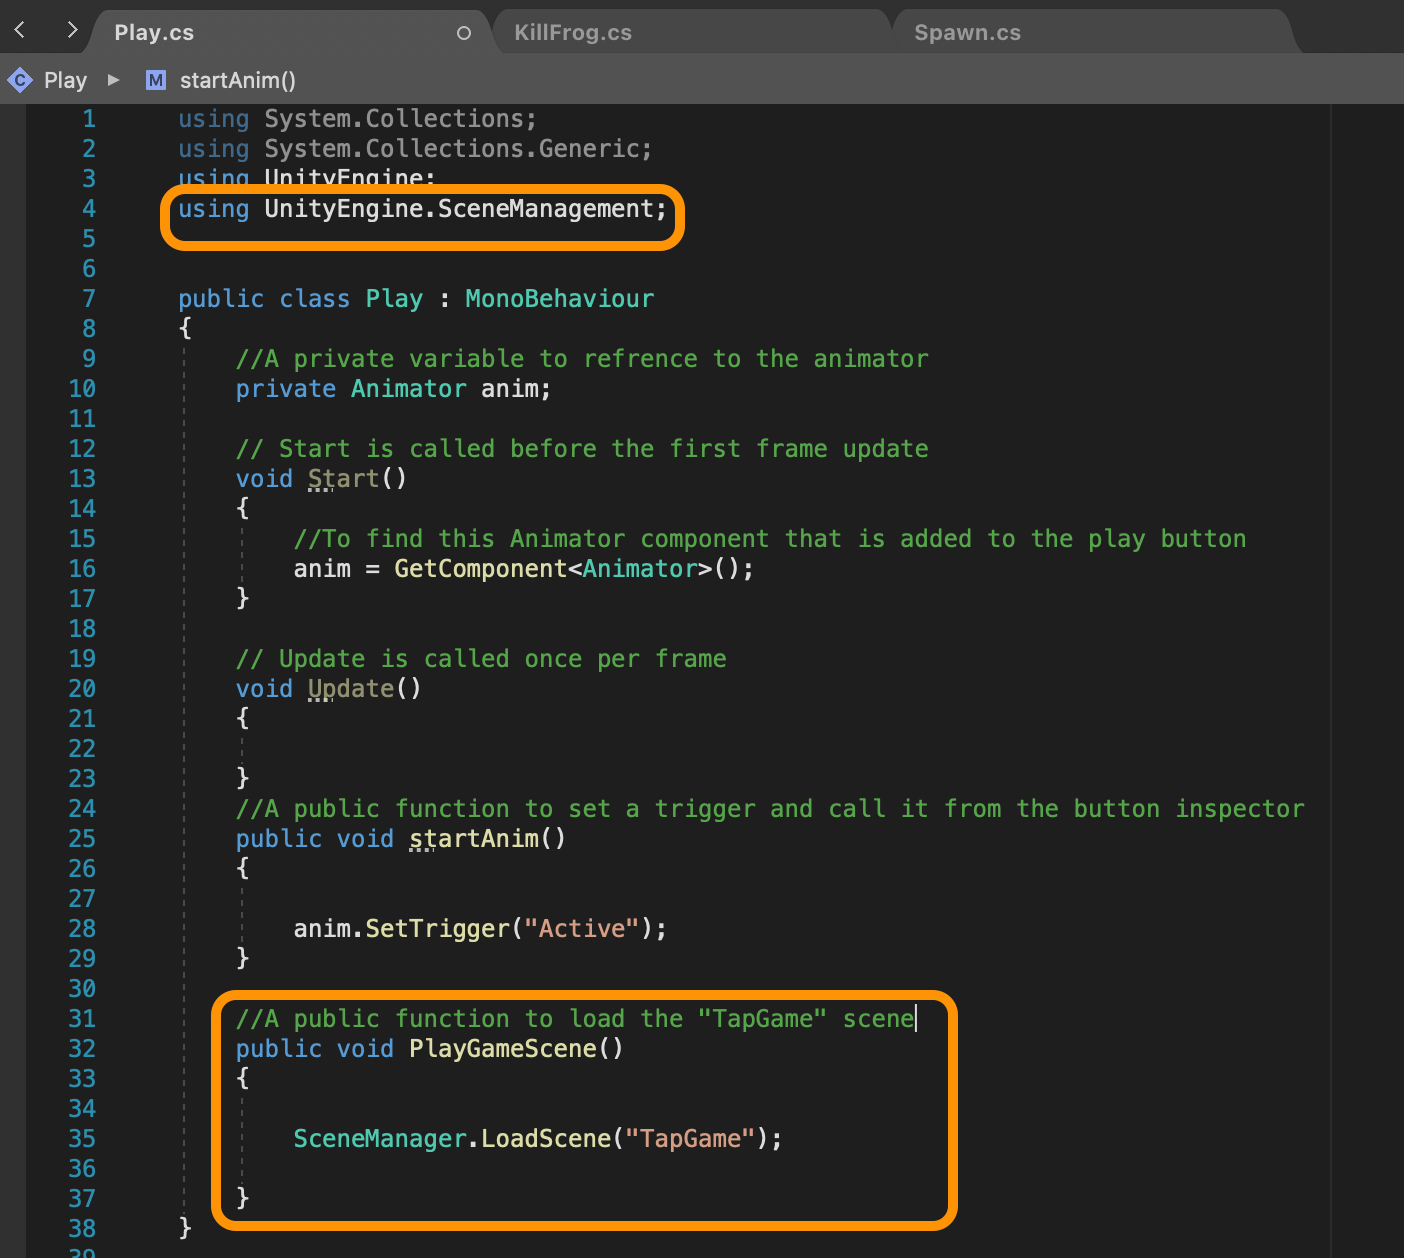
It doesn’t do anything (yet) after the animation ends. So we need to write a script that will take us to the game scene. In the “Play” script, add the following code:
To complete this feature, we need to add an event to the final step of the animation. Return to the animation window and add an event at the 0.10 second interval and select the function “PlayGameScene” as shown below:
Play the game and see what happens. You'll notice an error occurring:
“Scene 'TapGame' couldn't be loaded because it has not been added to the build settings or the AssetBundle has not been loaded.”
So, to move from scene to scene, all the scenes should be added to the build settings. To do so, click on File > Build Settings > Add Open Scenes as shown below. (If the TapGame scene is already open, it will be added. If not, make sure to open it and add it.:
Now play the game one more time.
We have a functioning play button that transitions us right into the game.
Pause Feature
Jumping back into the game scene, we need to be able to pause the game (open a pop-up window) and then resume playing. Let’s first add the UI elements for this feature.
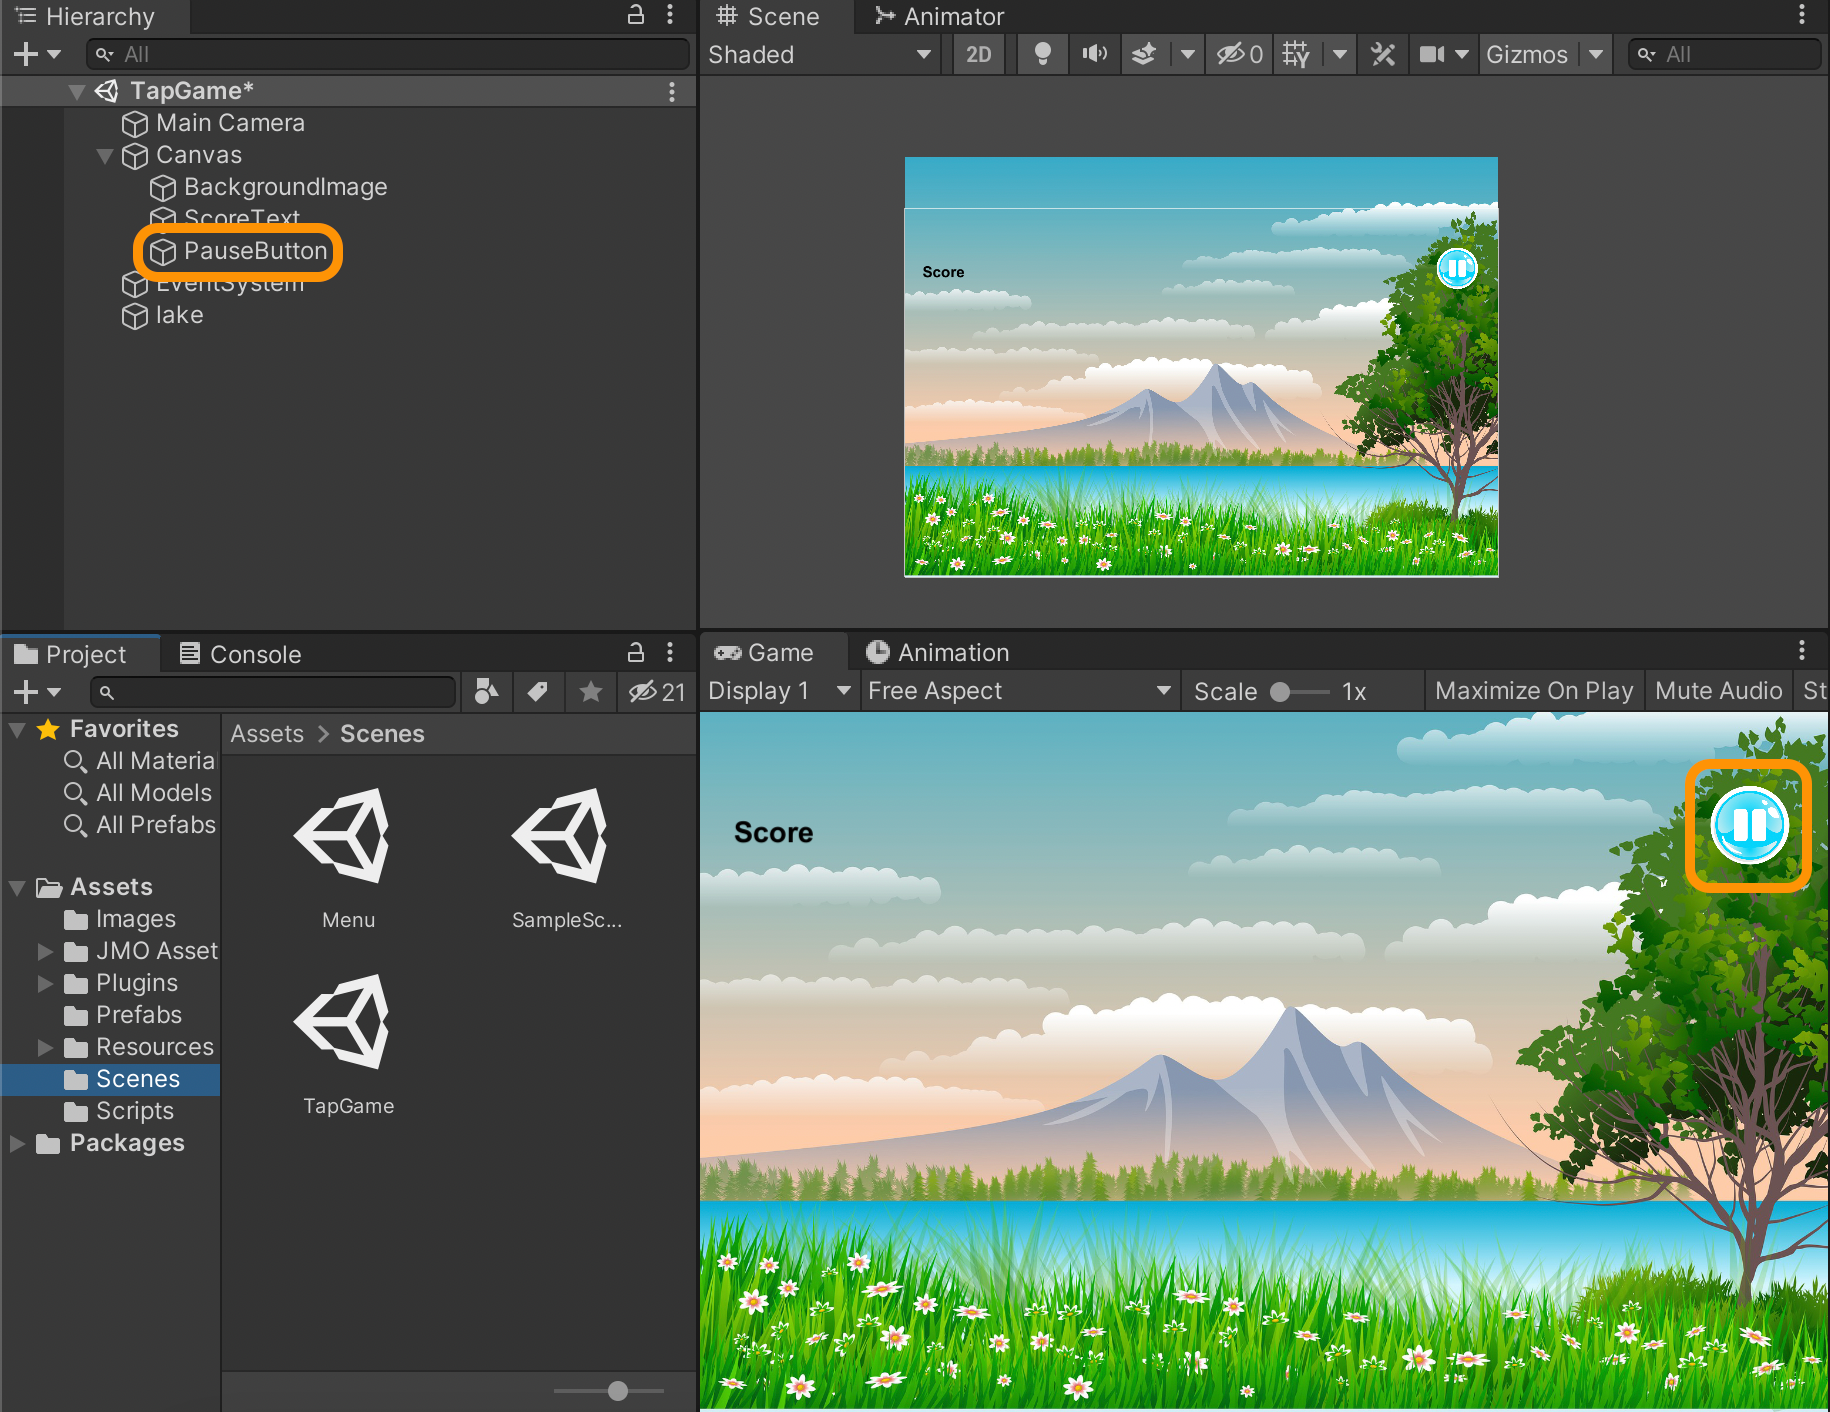
Add the pause button to the top right of the scene exactly like we did with the play button in the menu scene. It should look something like this:
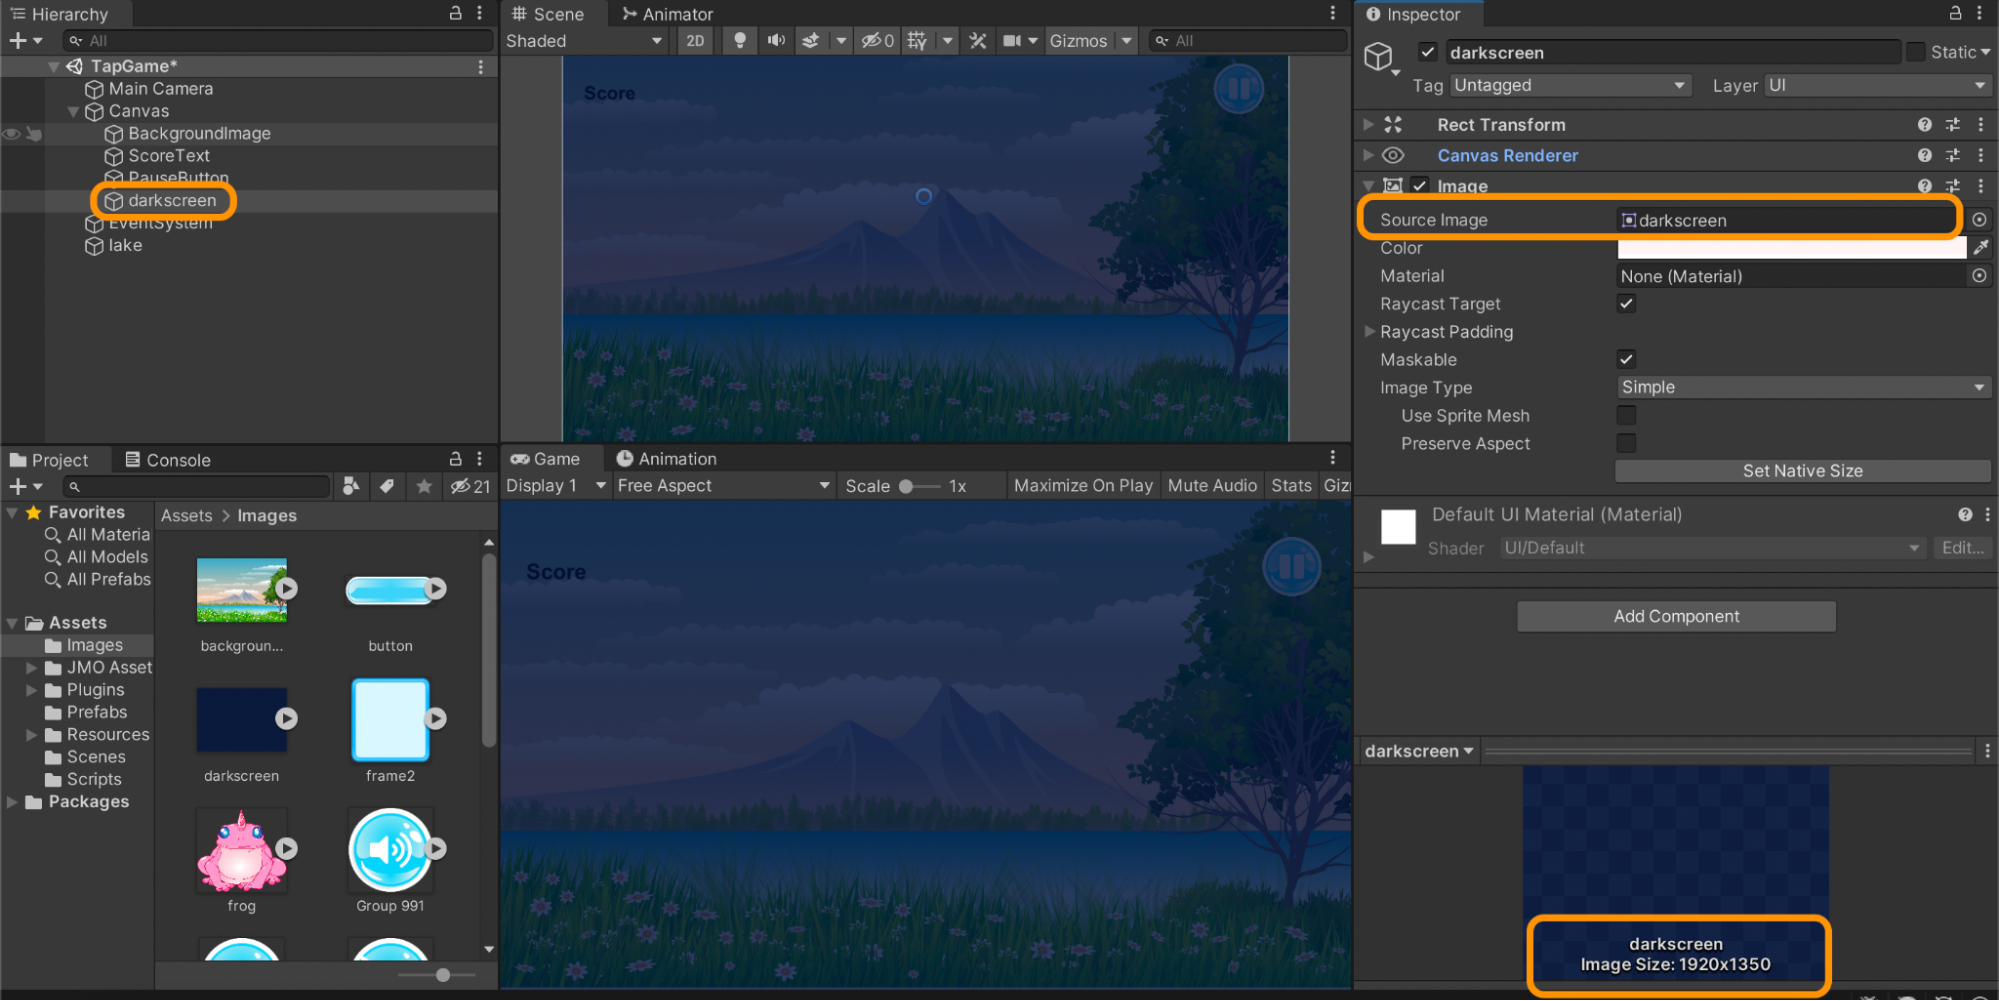
Next, we will make the UI for the pause pop-up window. We need a dark background image the same size as the background image and with an opacity of ~80% so we can still see a little bit of the background as shown below. Let’s duplicate the background image in the scene and replace the image with the dark background image.
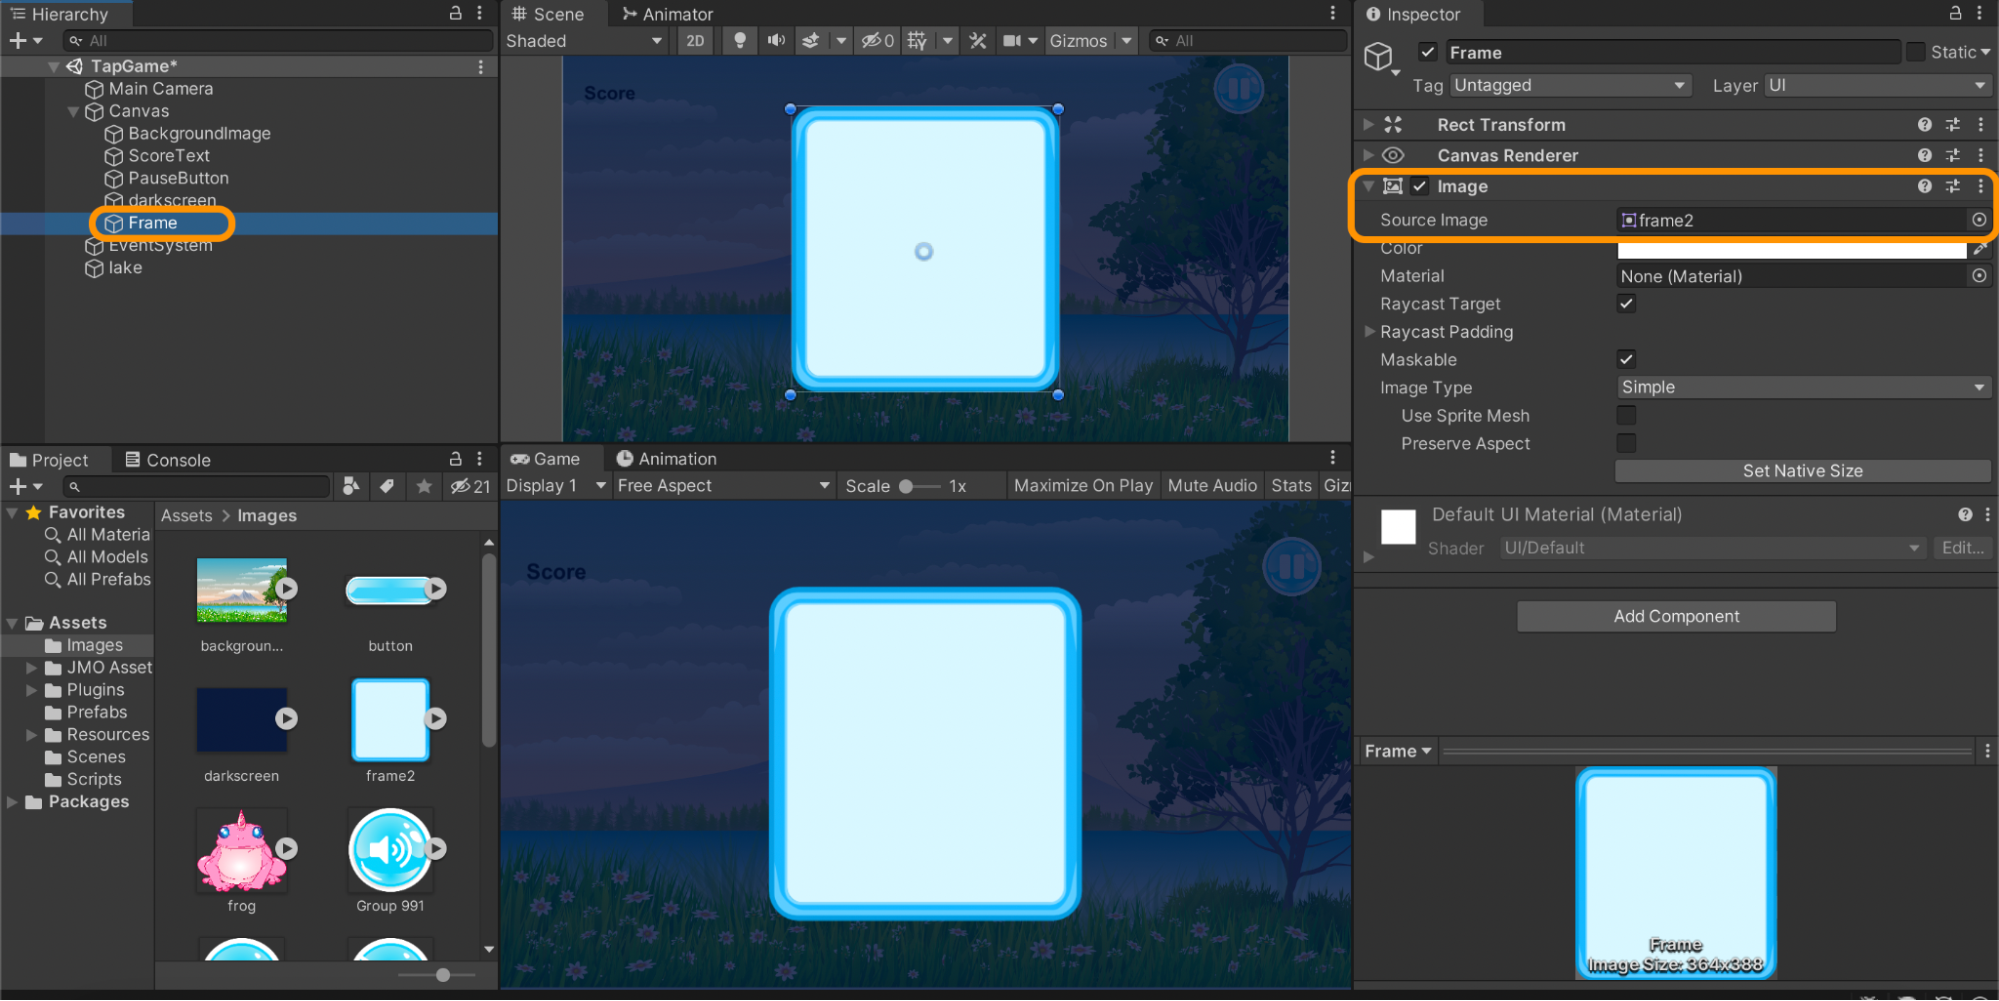
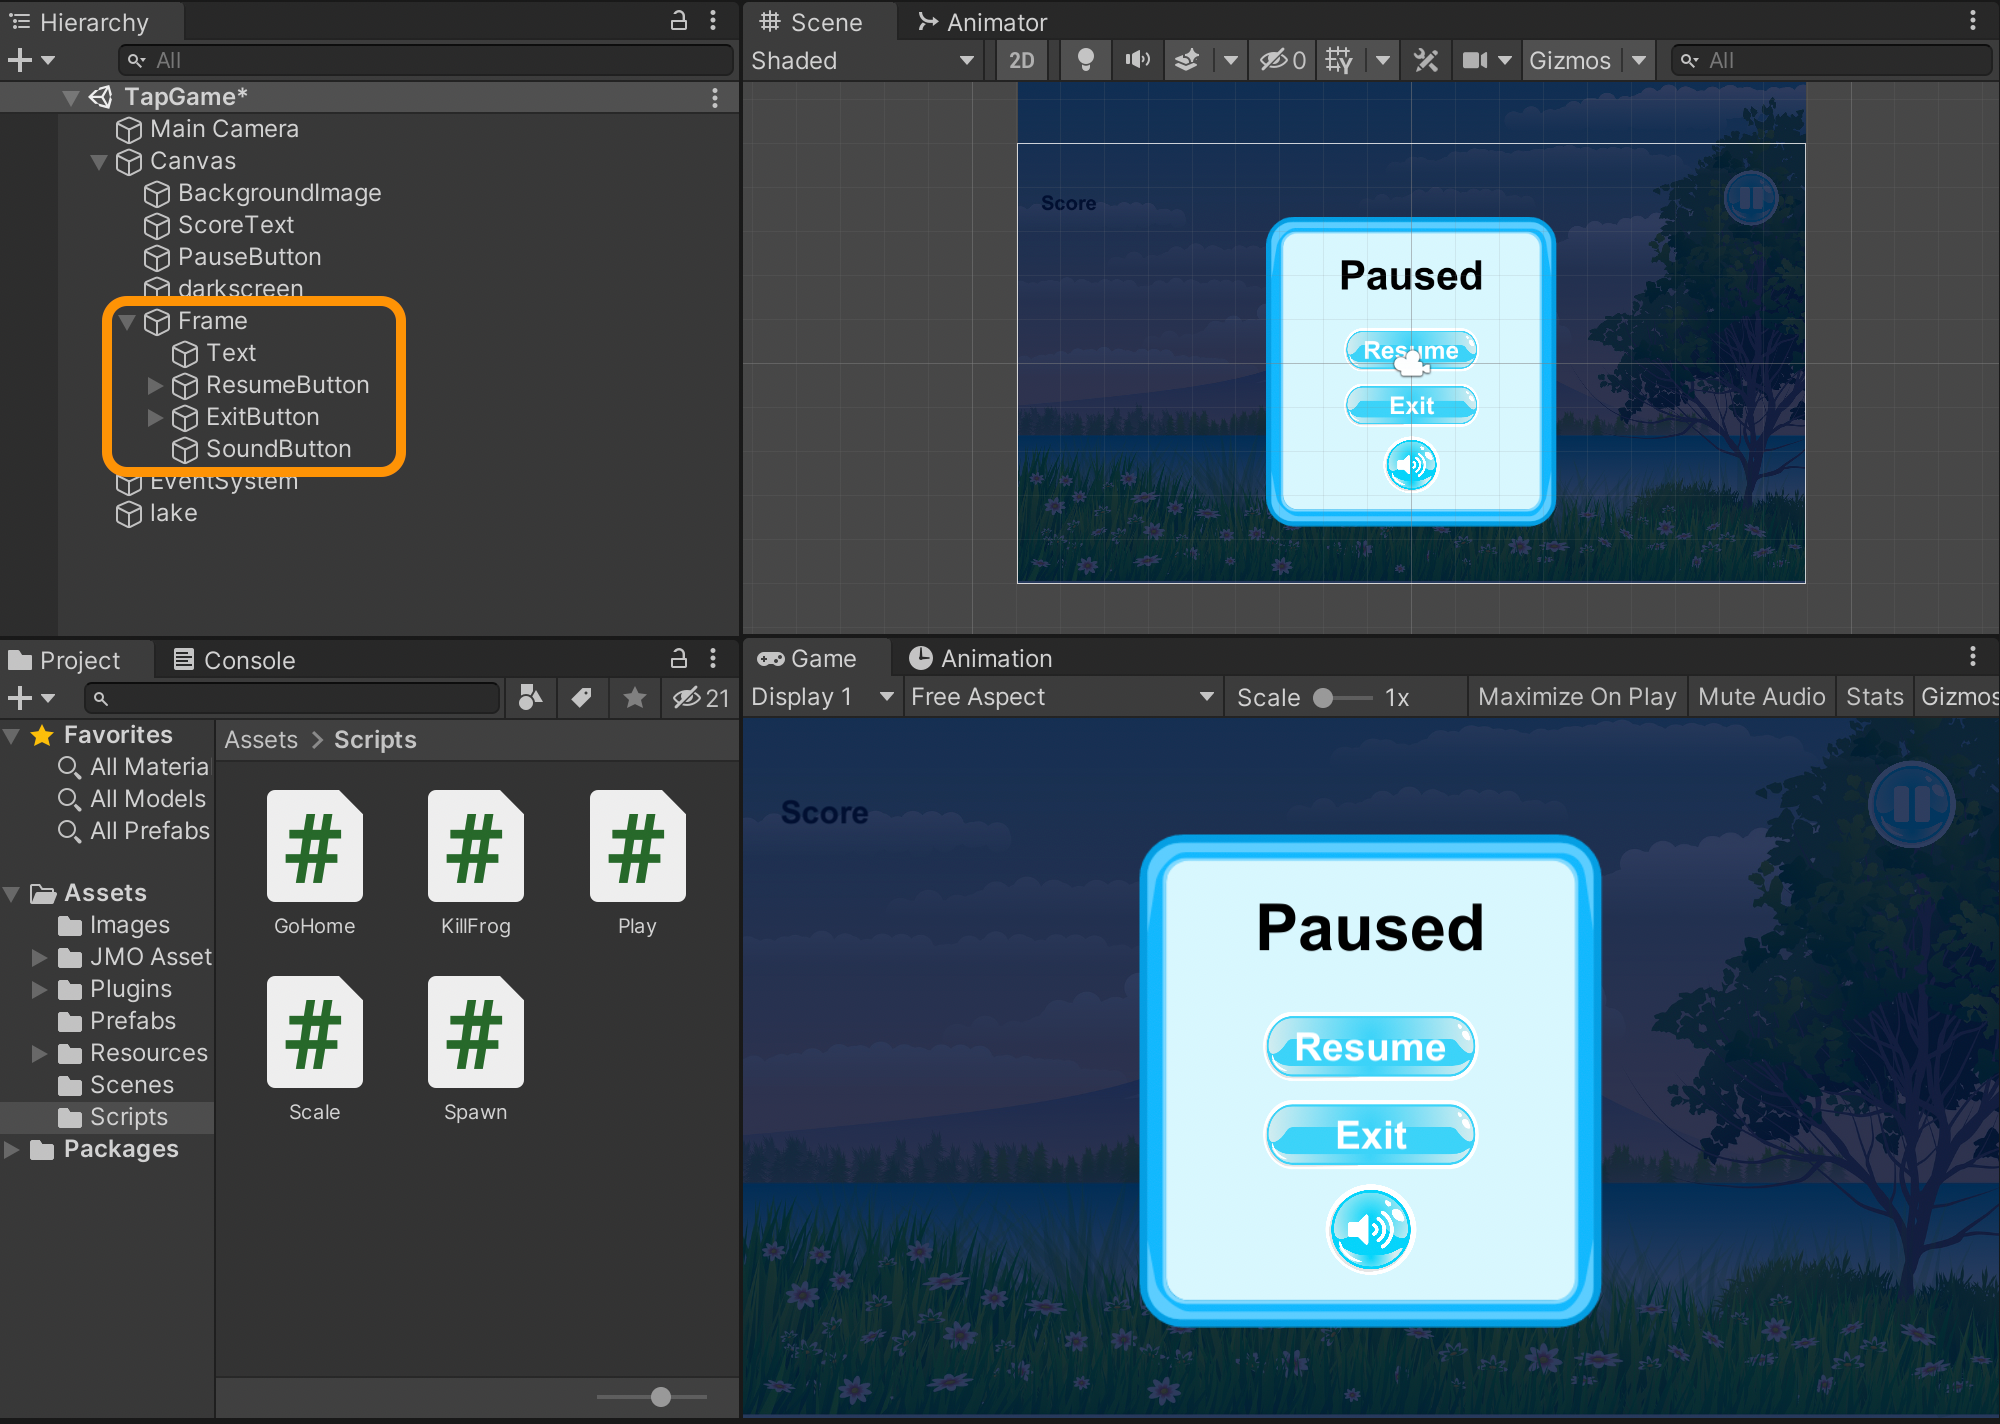
Continuing on, we need to add an image for the frame of the pause window. It needs to be an image, not a sprite. If you drag the frame image from the project assets into the hierarchy, it will be a sprite, and you won’t be able to add or see other content (for example, text or buttons). It should look something like this:
Next we'll add text “Paused” to the top center of the frame to indicate the game is in a paused state, two buttons for users to “Resume” and “Exit”, and finally a third button to toggle sound on/off. It should look something like below, but the buttons won’t do anything until we write some functions. All the objects are children of the Frame game object.
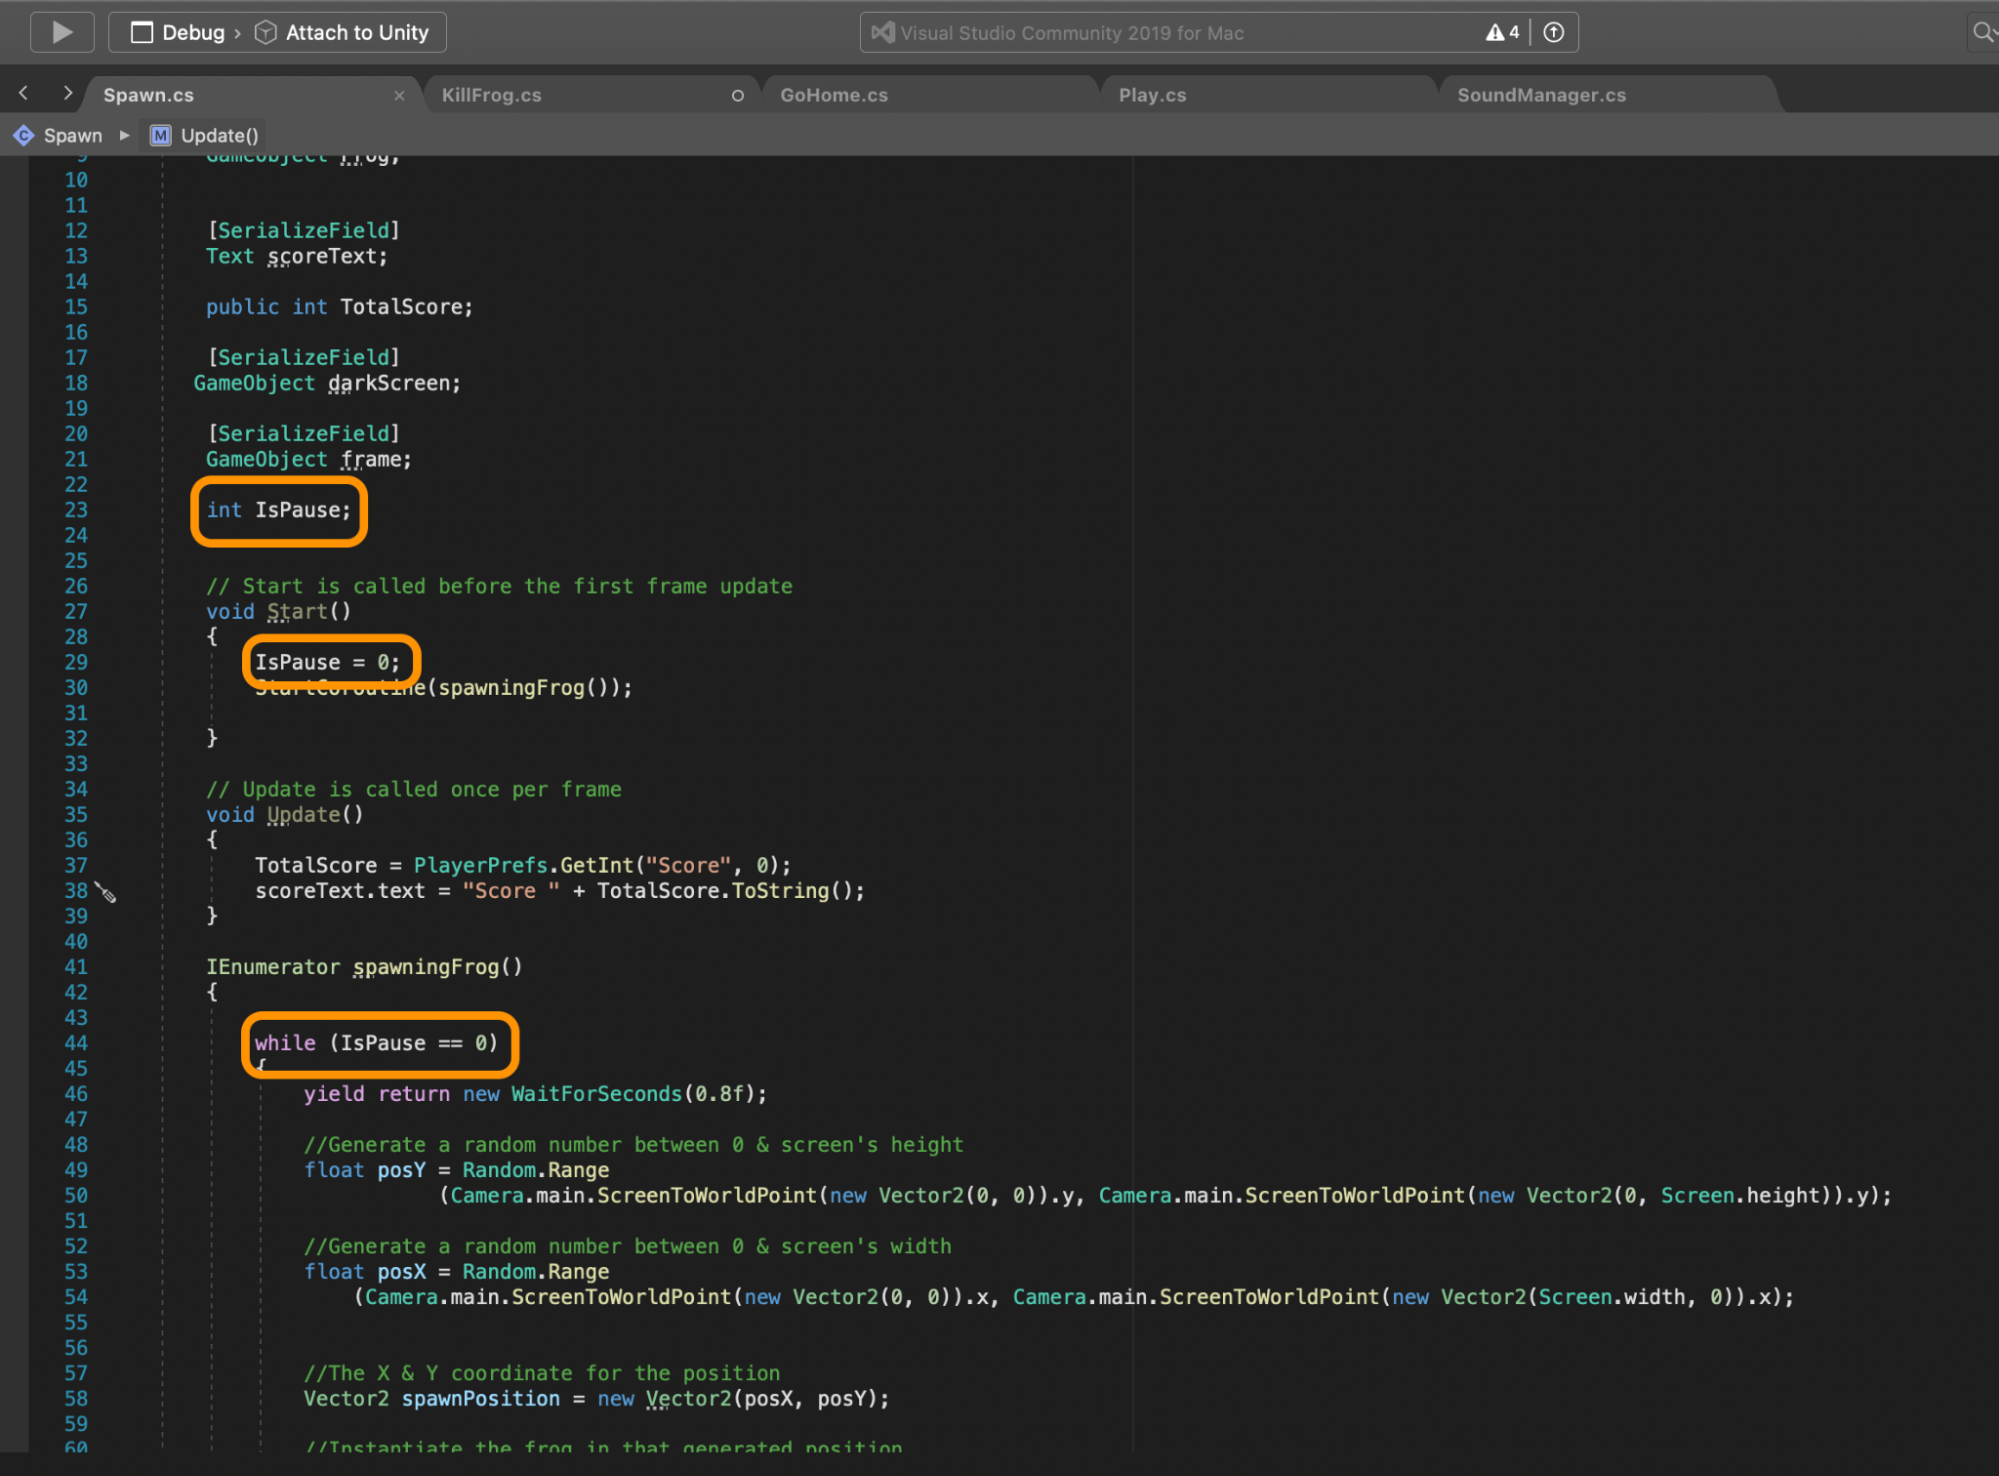
Time to code these buttons. We’ll start with the pause button in the game scene. We want to pause playing the game, show the dark scene, and display our paused window. To pause the game, we need to add a condition to the IEnumerator in our “Spawn” script:
Next, we need to write a “pause the game” function within the “Spawn” script:
public void PauseGame()
{
IsPause = 1;
darkScreen.SetActive(true);
frame.SetActive(true);
}Add this function to OnClick() of the pause button:
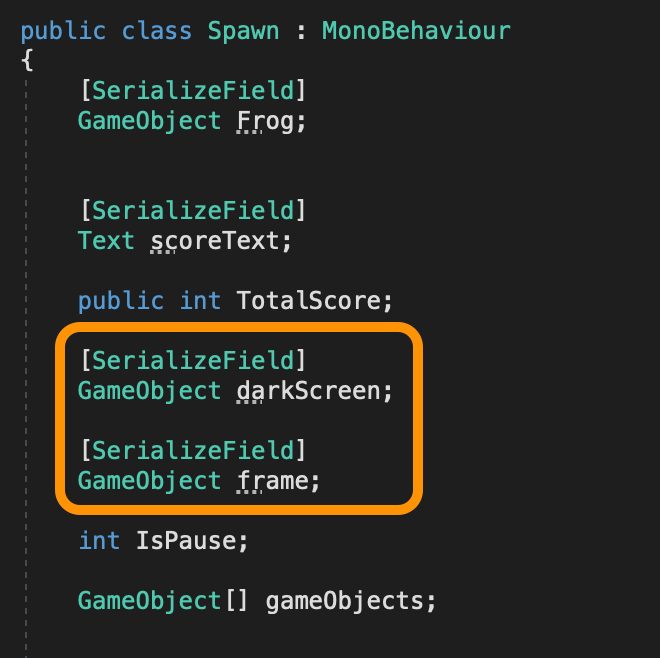
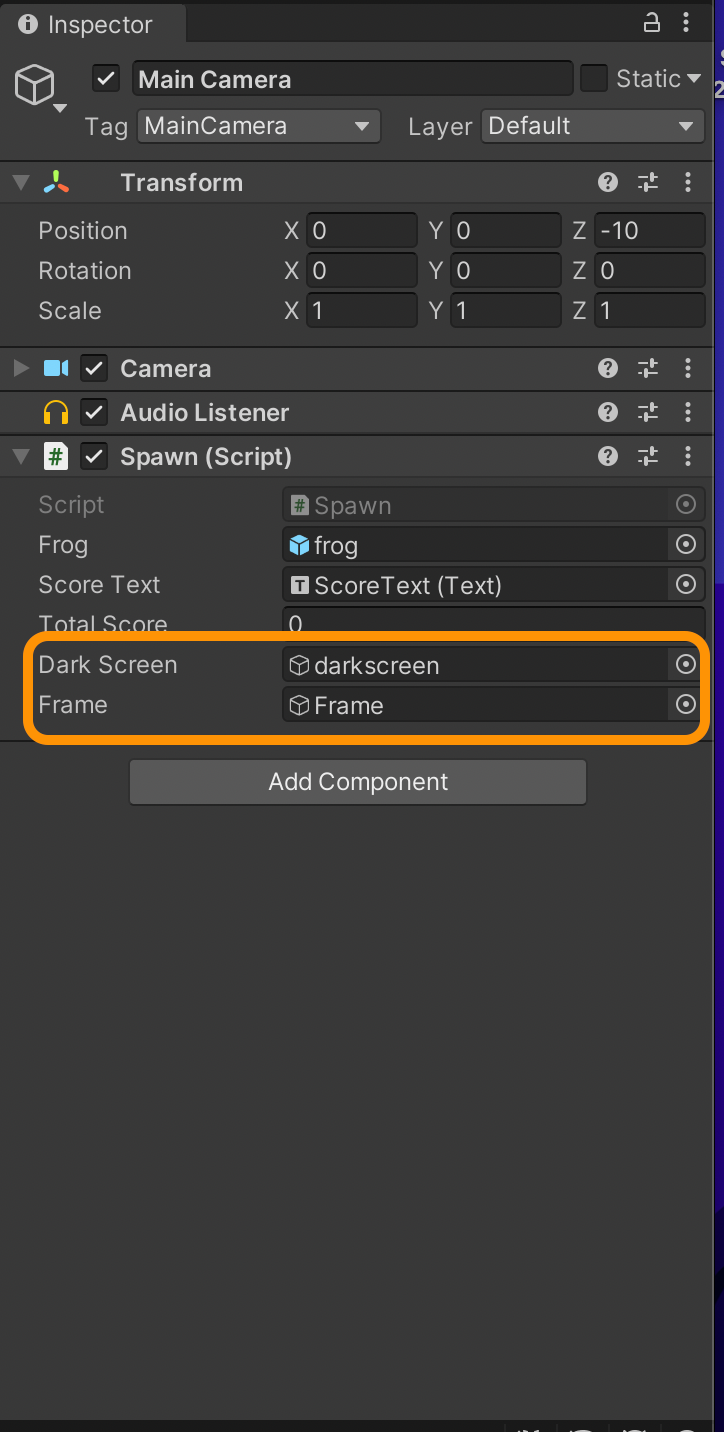
Before we try this code, make the public reference to the frame and the dark screen in the Spawn script as shown below:
Then drag the dark screen object and the frame objects from the scene into the empty fields in the inspector for the Spawn script as shown below:
When we play the game, the frogs that were already generated are still there after we press the pause button, and the frame is active. To fix this problem, we’ll simply destroy these frogs because it is faster and easier compared to keeping the same frogs, pausing their movement, maintaining their location, and continuing falling down the screen after we press resume.
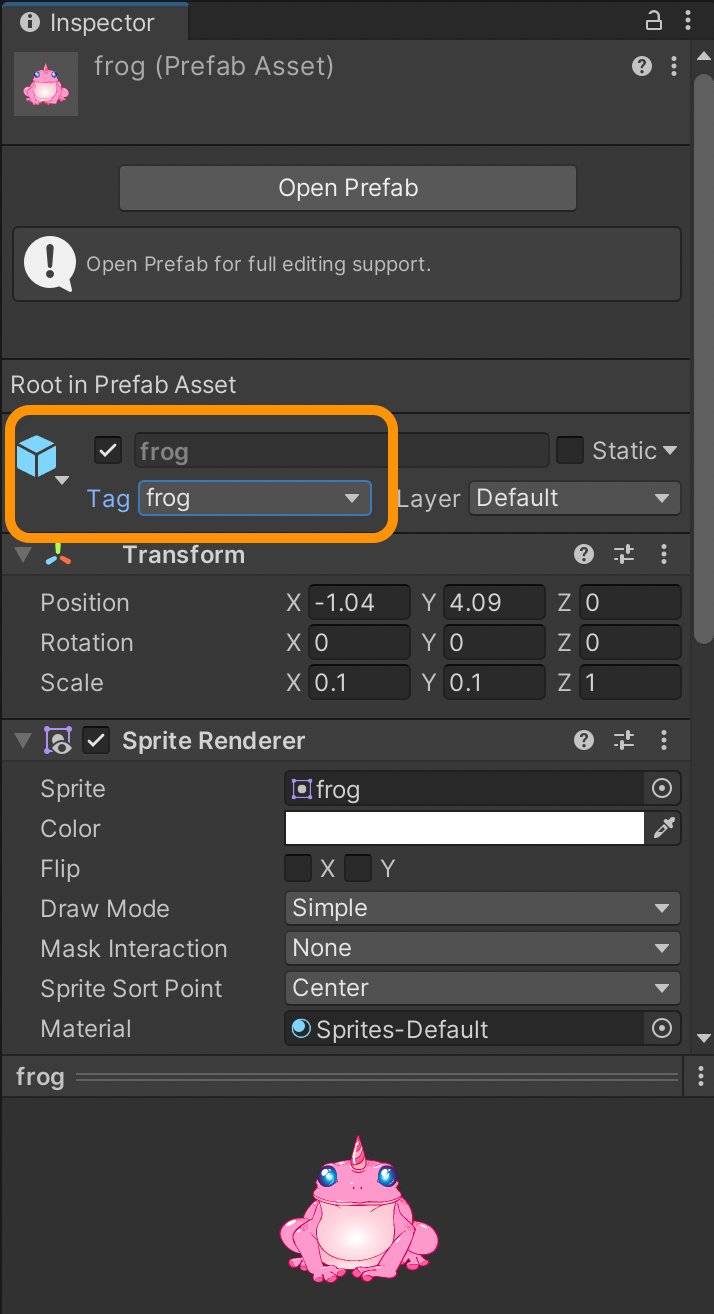
Let’s add a tag, “frog”, then destroy game objects with the tag “frog”.
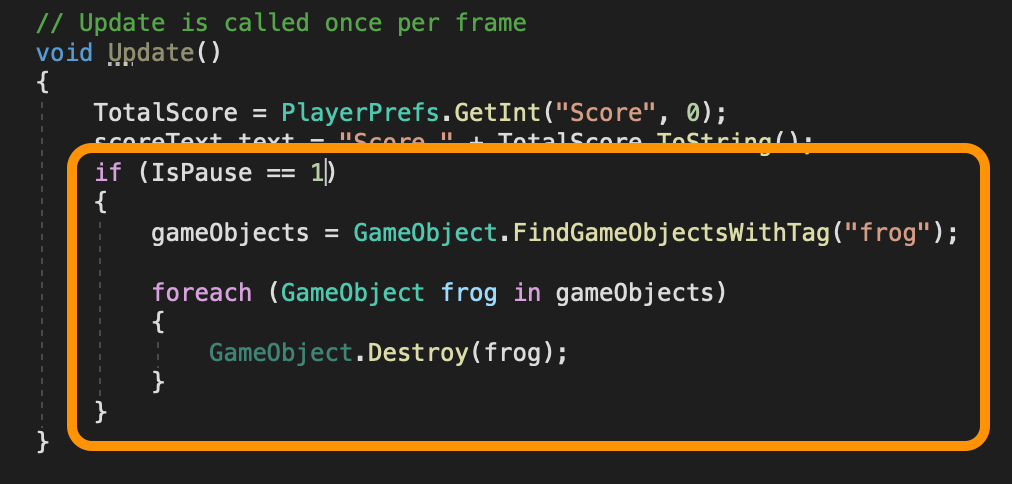
Head back to the Spawn script we just updated and write the following code. to destroy the frogs already in the scene by finding the game objects with the "frog” tag we just added.
For the resume button, we need to reverse what we did for the pause button; set the dark screen and the frame to be inactive, set isPause to 0, and start the coroutine again. Write the following code in the “Spawn” script...
public void ResumeGame()
    {

        IsPause = 0;
        darkScreen.SetActive(false);
        frame.SetActive(false);
        StartCoroutine(spawningFrog());
    }
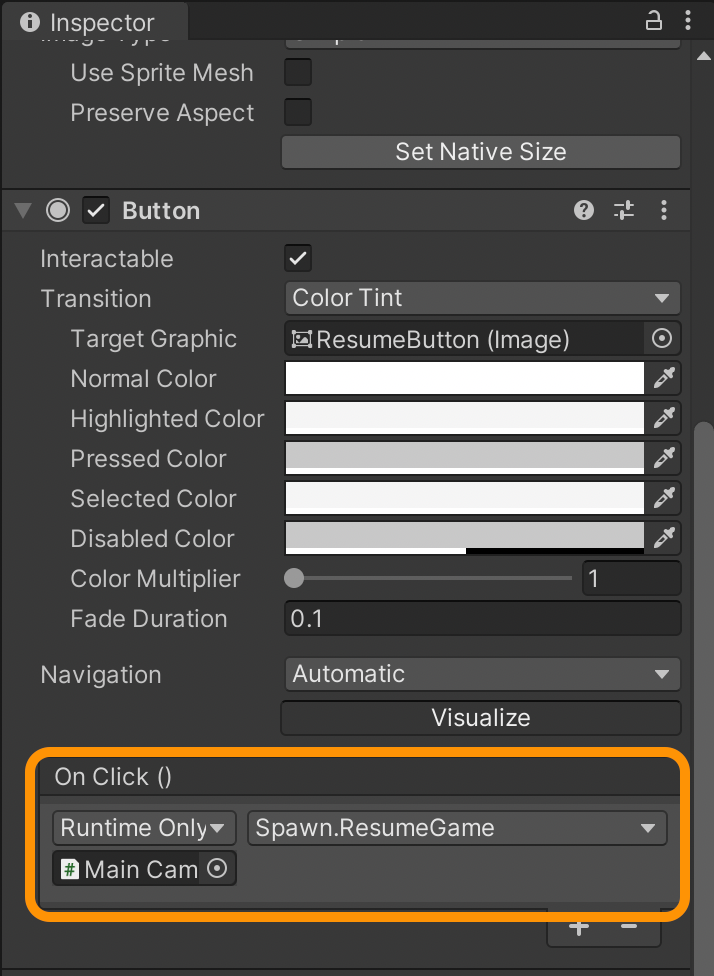
...and add this function to OnClick() of the resume button. It should look like this:
For the exit button, we just want to go back to the menu scene. Load the menu scene as we did before (using the script below) and attach it to the exit button.
In the inspector for the exit button, select the function from the drop down menu for the OnClick() as shown below.
Time to check the pause & resume buttons. The experience should look like this:
Adding sound
Before adding a sound button to toggle on/off, we need to first add sounds. Let's add a sound when the frog explodes. You can search for free sounds for commercial use online or use files you’ve paid for already. Import the file into the assets folder once you've downloaded it.
Next, attach the sound script to an empty game object and refer to the script when we need it. Create an empty game object and name it “SoundManagerObject”. Create a C# script, name it “SoundManager”, and attach it to the object created.
We will write the following code in this script.
using UnityEngine;
using UnityEngine.UI;

public class SoundManager : MonoBehaviour

{

    //A public variable for the audio source we just imported.
    public AudioSource explosionSound;

    //A variable to check whether the user wanted a sound or the user muted it.
    int IsSound;

    //References to the sound buttons and its two images.
    public Sprite soundImage;
    public Sprite noSoundImage;
    public Button SoundButton;

    // Start is called before the first frame update
    void Start()
    {
        //Get the sound value from the player preferences.
        IsSound = PlayerPrefs.GetInt("Sound", 1);

        //Check if the user wants a sound or not.
        if (IsSound == 1)
        {
            //Change its image
            SoundButton.GetComponent<Image>().sprite = soundImage;
        }
        else
        {
            //Change its image
            SoundButton.GetComponent<Image>().sprite = noSoundImage;
        }

    }

    public void playSound()
    {
        IsSound = PlayerPrefs.GetInt("Sound", 1);

        if (IsSound == 1)
        {
            //Play the explosion sound
            explosionSound.Play();

        }

    }
    public void muteSound()
    {
        //Reduce the volume to zero

        explosionSound.volume = 0;
    }

    public void unmuteSound()
    {
       //Raise the volume to one
        explosionSound.volume = 1;
    }

public void ToggleSound()
    {
        //Check if the sound is on, equal to 1
        if (IsSound == 1)
        {
            //Change the variable to zero and save it in preferences
            IsSound = 0;
            PlayerPrefs.SetInt("Sound", IsSound);
            PlayerPrefs.Save();
            SoundButton.GetComponent<Image>().sprite = noSoundImage;
            muteSound();

        }
        else
        {
            IsSound = 1;
            PlayerPrefs.SetInt("Sound", IsSound);
            PlayerPrefs.Save();
            SoundButton.GetComponent<Image>().sprite = soundImage;
            unmuteSound();
        }
    }

}
Up until this point the frogs haven't made any sound when they explode, and our sound button cannot be used to mute/unmute. We need to toggle the sound button. Head to the sound button inspector and add the OnClick() function of “ToggleSound()” as shown below:
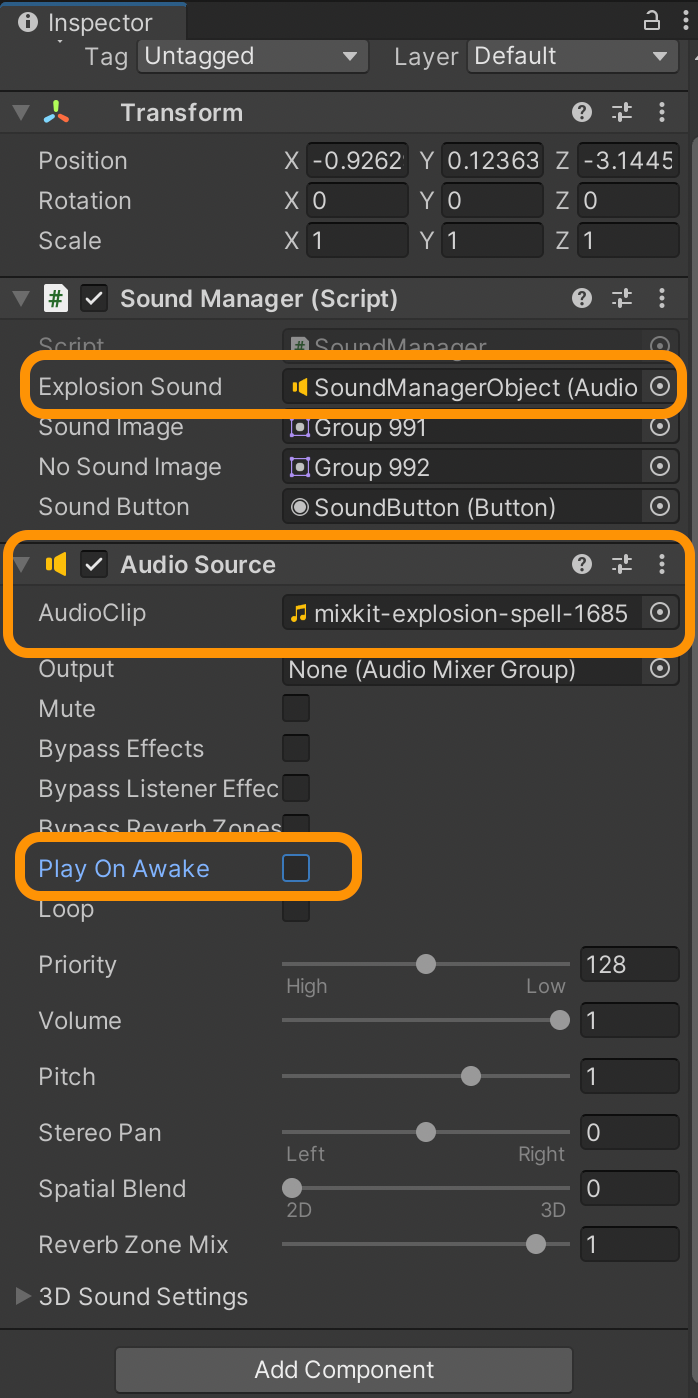
The only thing missing is an explosion sound when the frog explodes. To do so, we need to add the audio source component to the “SoundManagerObject” game object. Select it, add the “Audio source” component, and drag the sound file into the empty field as shown below.
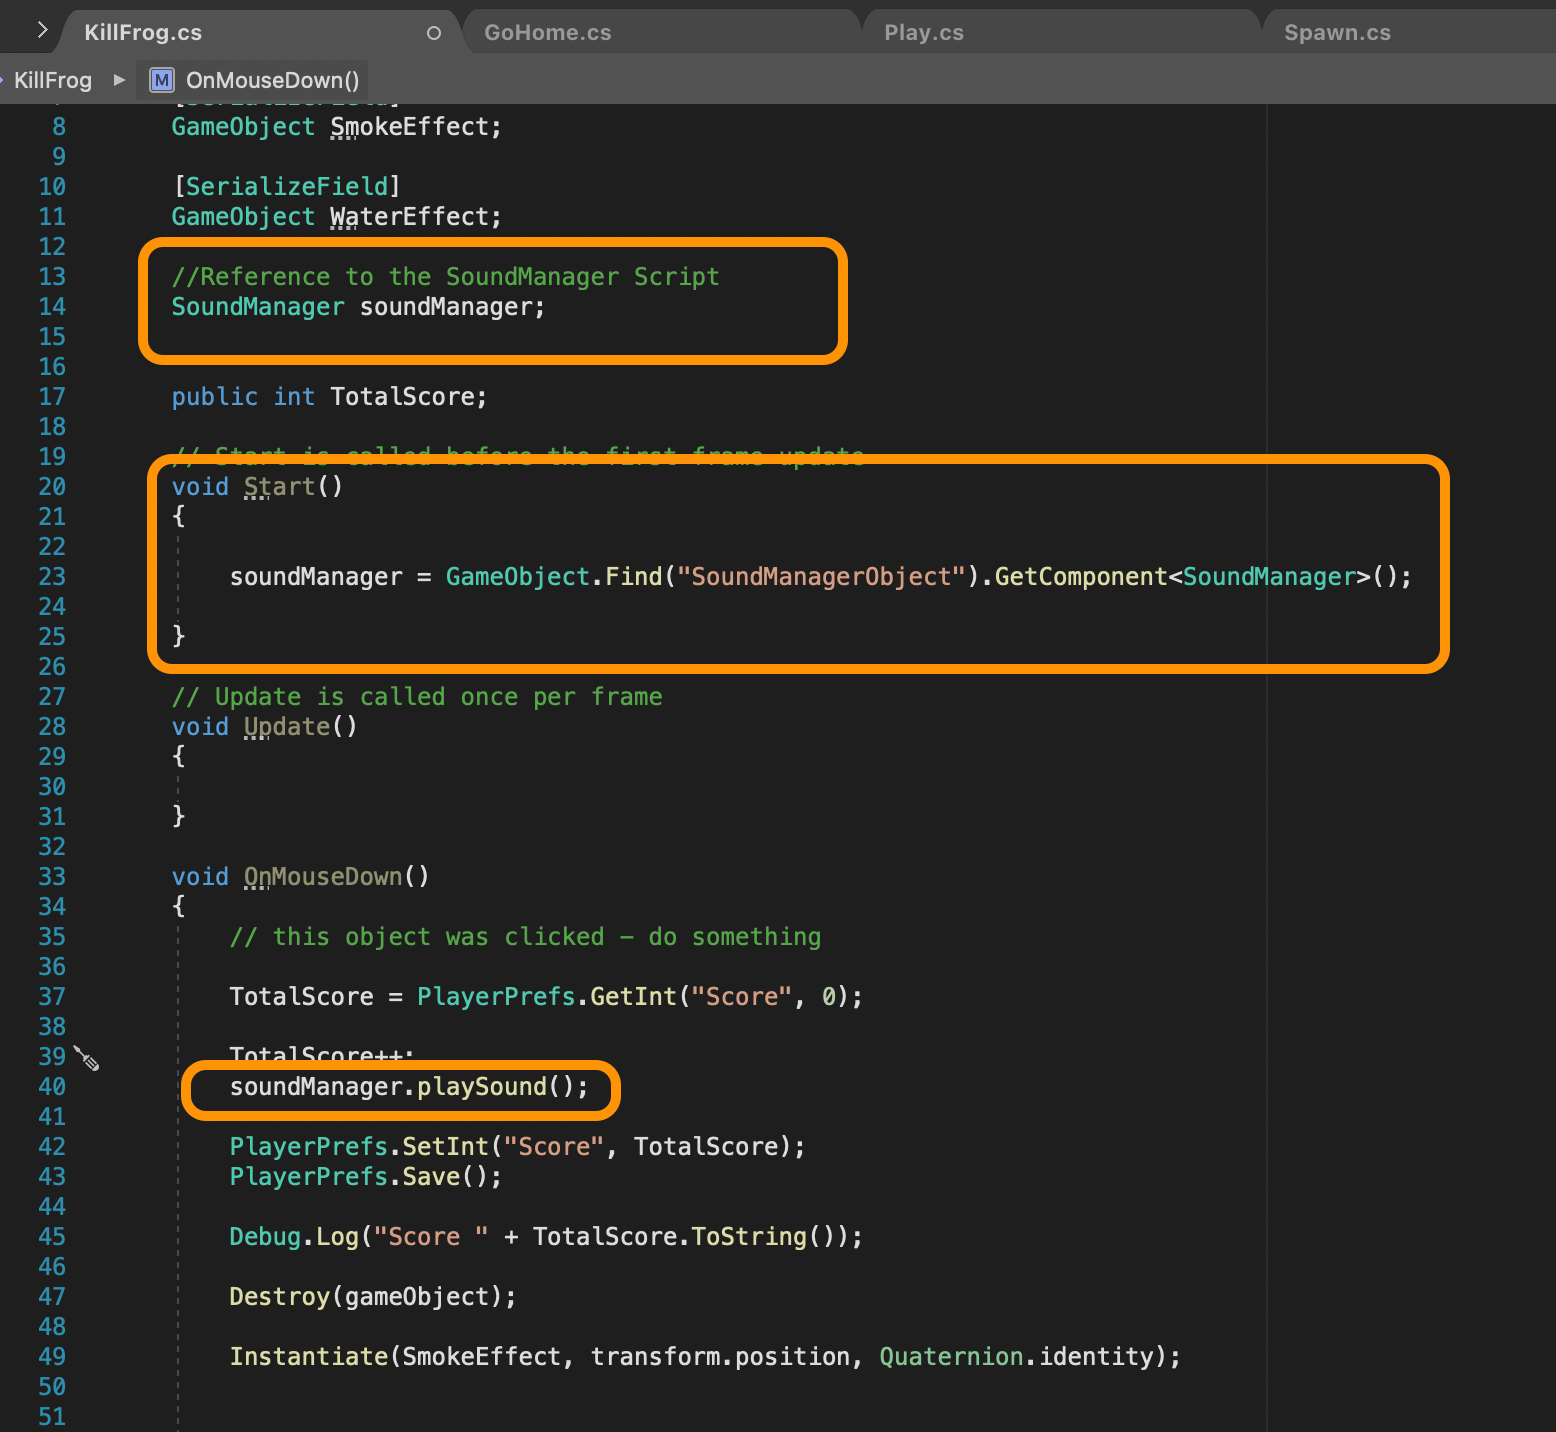
Lastly, edit to the “KillFrog” script to play the sound when we click/destroy the frog. We will add the following code inside this script:
Our game is ready to play.
I hope this 3 part series has been helpful as you begin developing more games in Unity. Thank you for reading and I hope you enjoy playing the frog game you just created.

